

Before you send
Tented sends marketing email from your own domain — which means better deliverability and emails that are unmistakably yours. Before your first campaign, there’s a one-time setup: verify a sending domain and fill out your sender profile. Sending is blocked until your domain is verified, so this is step one. Everything lives in one place: click your profile in the bottom-left corner, choose Settings, then choose Email in the settings menu.1. Verify your sending domain
Add a domain you own, and Tented generates the DNS records that let mailbox providers verify your email is legit — SPF, DKIM, and DMARC.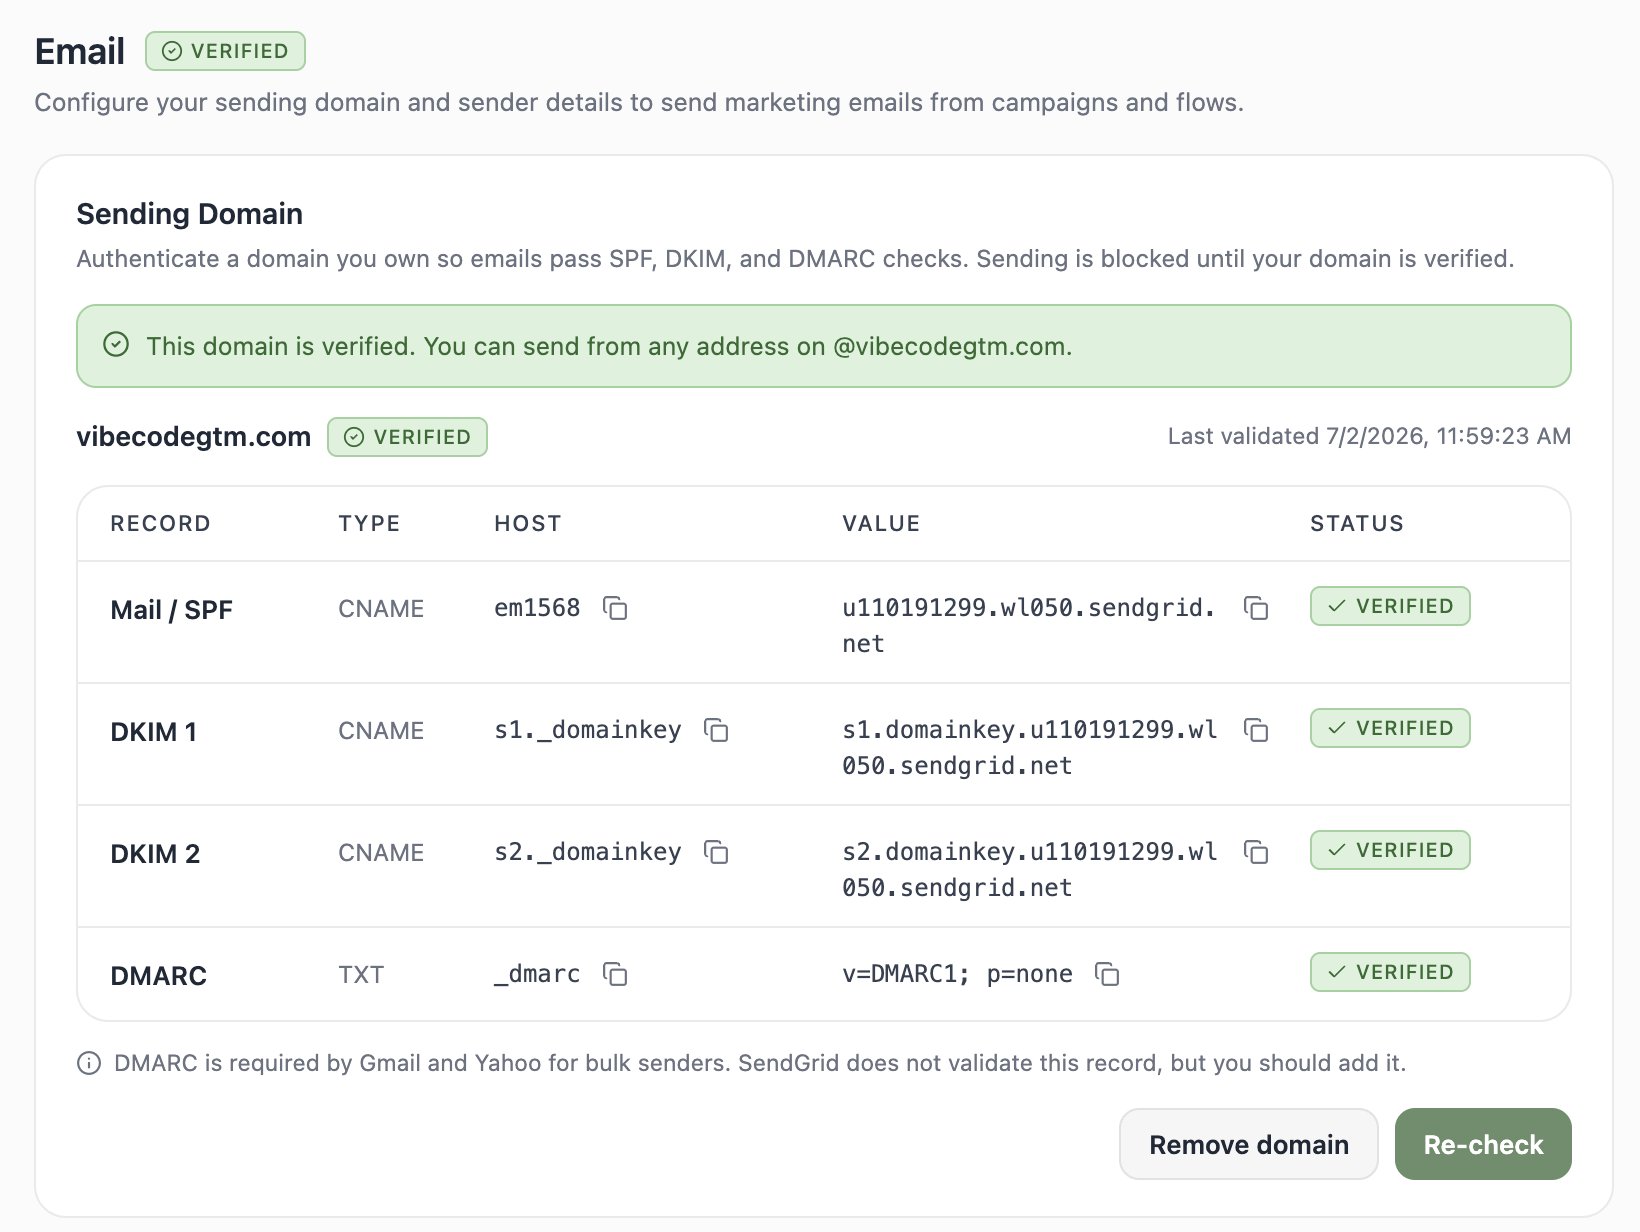
Sending domains are available on every plan, Free included — verifying a domain is part of getting set up, not a paid feature. Free-plan limits apply to sending volume instead: 100 emails per day, and flows require Pro or Max to activate.
- Enter your domain (for example,
yourcompany.com). - Copy each generated record — a few CNAMEs and a TXT — into your DNS provider (GoDaddy, Cloudflare, Namecheap, etc.).
- Click Re-check. DNS changes can take a little while to propagate, so don’t panic if it’s not instant.
hello@yourcompany.com, news@yourcompany.com, whatever fits.
2. Complete your sender profile
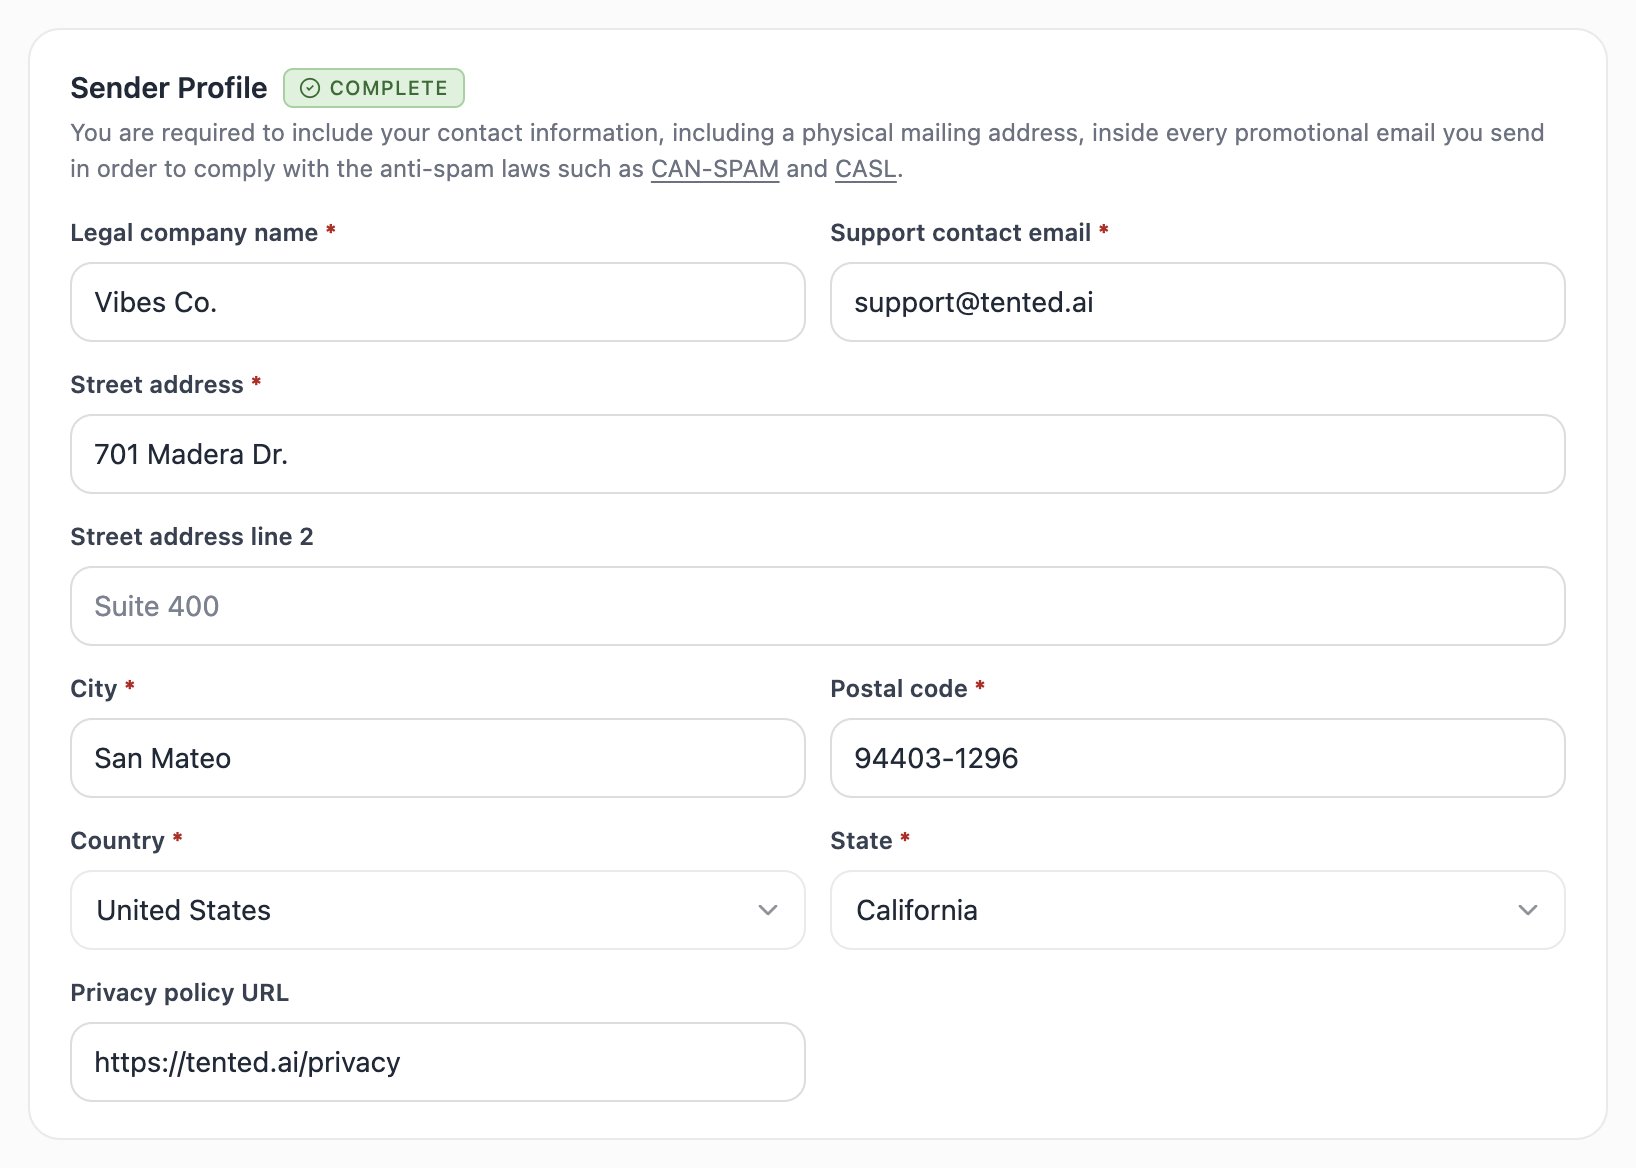
Anti-spam laws like CAN-SPAM and CASL require every promotional email to include your contact information — including a physical mailing address. Your sender profile is where Tented gets it:- Legal company name and support contact email
- Street address, city, postal code, state, and country
- Privacy policy URL (optional, but a nice touch)
3. Set your default email headers
Save yourself some typing: set a default from name, from address, and reply-to. Every new email starts pre-filled with these, and you can always override them on a specific email before sending.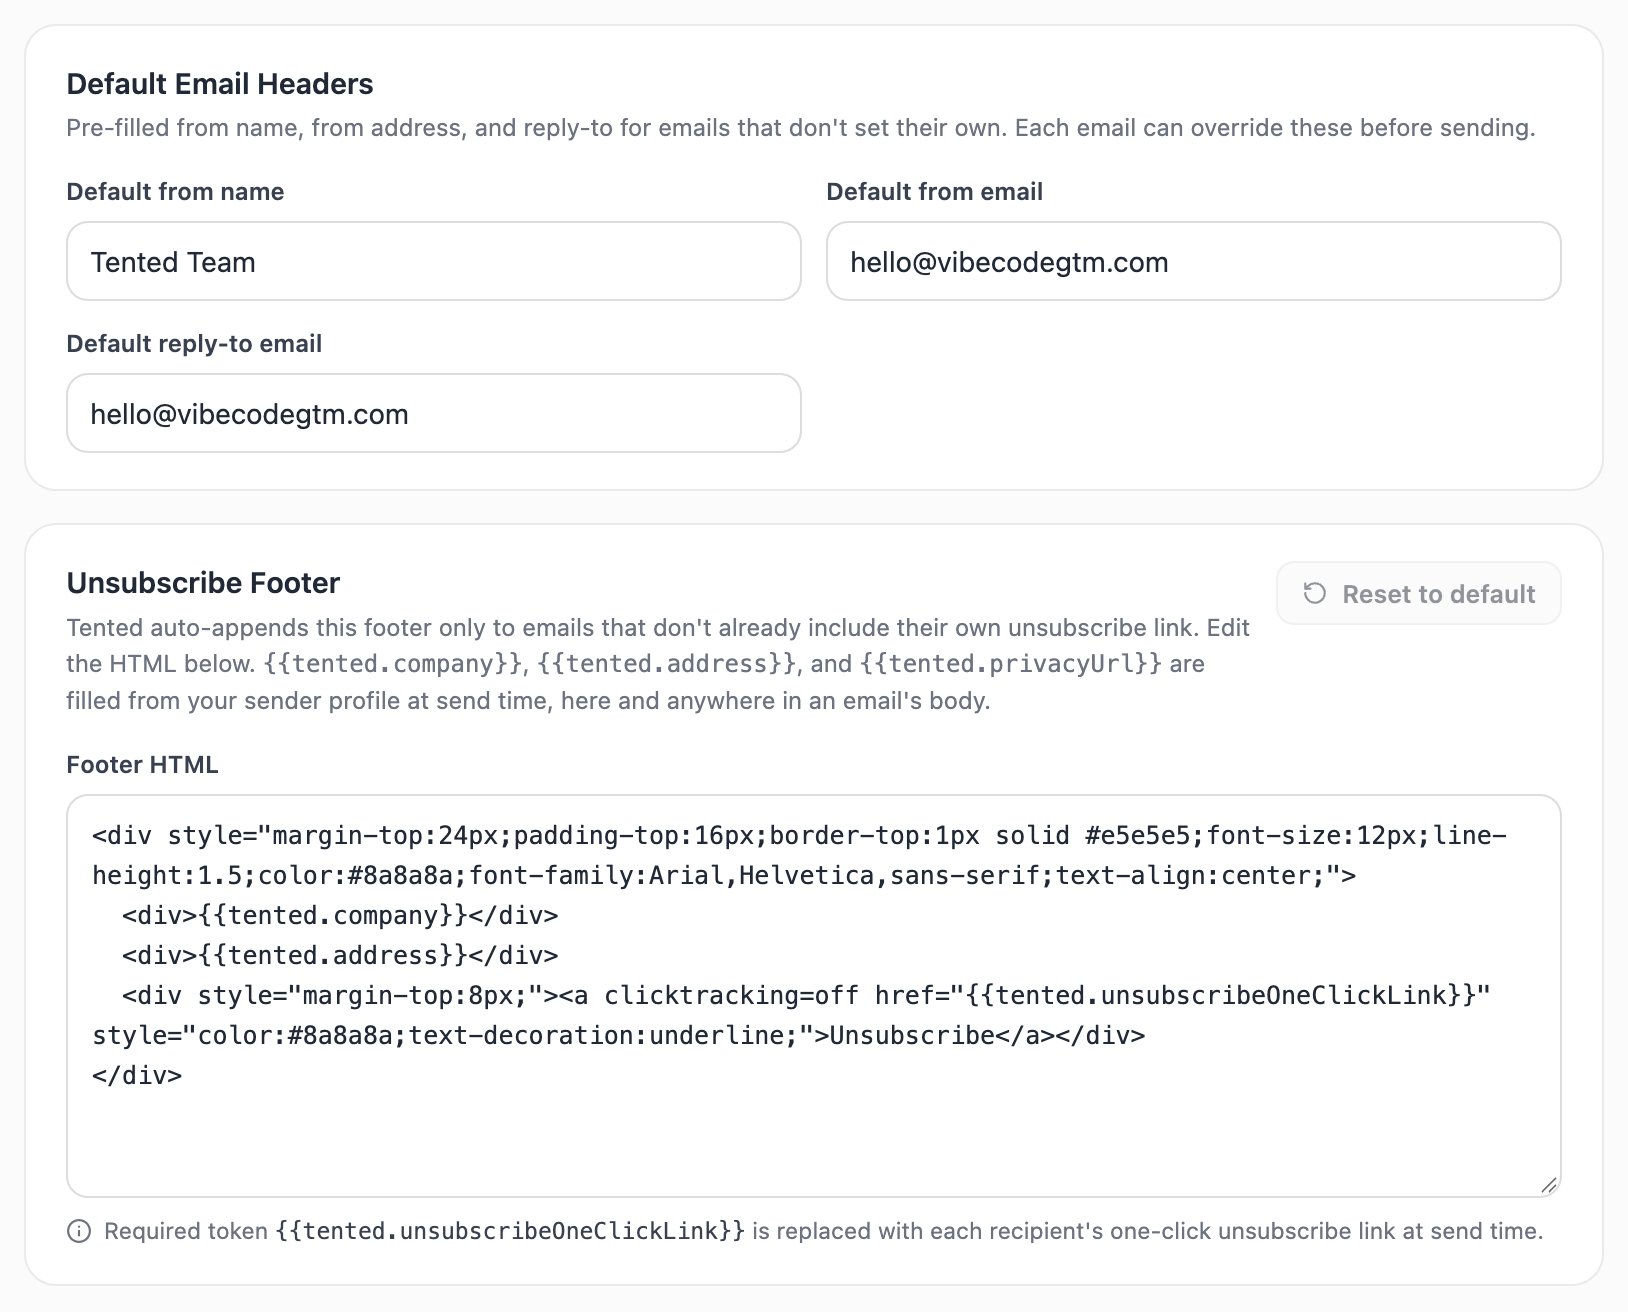
4. Review the unsubscribe footer
Marketing emails must include a working unsubscribe link. Tented auto-appends a footer to any email that doesn’t already include its own — and you can customize its HTML here. The footer supports tokens that are filled from your sender profile at send time:{{tented.company}}— your legal company name{{tented.address}}— your mailing address{{tented.privacyUrl}}— your privacy policy URL{{tented.unsubscribeOneClickLink}}— required — each recipient’s personal one-click unsubscribe link
When a contact unsubscribes, Tented flips their Unsubscribed field and quietly excludes them from future marketing sends. You don’t need to manage suppression lists yourself.
5. Decide who else is held back
The Send Suppression panel shows who never receives a marketing blast or flow. Two rules are built in and cannot be changed:- Unsubscribed is Yes. Operational sends bypass this one.
- Marketing Email Invalid is Yes (a hard-bounced address). This blocks every send, operational included.
- Marketing Email Subscribed is where CSV imports and the Shopify integration record consent. Block when No and when not set, and only contacts who explicitly opted in receive marketing email. This is the right setting for a migration from another platform.
- Any Yes/No custom field works the same way, so a field like
gdprConsentorcatalogOptIncan gate sends without touching your audiences.
Deliverability & suppression
A few behaviors worth knowing so your sends stay healthy:- Unsubscribes are honored automatically. An unsubscribed contact is excluded from every future marketing blast and flow — you’ll see them counted as blocked when you pick an audience. There’s no re-subscribe flow, so if someone opts out, it sticks (they can be re-added only with fresh consent on your side).
- Hard bounces suppress themselves. When an address hard-bounces, Tented marks the contact’s email invalid and excludes it from every future send — operational included, since the address simply can’t receive mail. The flag is system-managed: it can’t be set by hand or by imports, and it clears automatically if the contact’s email address is updated.
- Bounces and spam reports are tracked. They show up in your blast and flow results so you can spot problem addresses, and you can export the bounced bucket to clean your list.
- One-click unsubscribe is built in via the
List-Unsubscribeheader, so Gmail and Apple Mail show their native unsubscribe button — which protects your sender reputation. - Operational sends bypass the unsubscribe preference only (password resets, security notices) — invalid, hard-bounced addresses stay excluded even there, and your added suppression rules are skipped. Keep that toggle off for anything promotional.
You’re ready to send 🎉
Next: Creating Emails with AI
Describe the email you want and watch Tented write and design it for you.