

What’s a triggered flow?
A triggered flow is marketing automation on autopilot: contacts enter when they match a trigger, then move through the steps you’ve laid out — sending emails, waiting, branching, updating fields — until they reach the end. Welcome series, onboarding sequences, re-engagement campaigns: this is where they live. Head to Campaigns and click Build a flow on the Triggered Flow card (or Add > Create Triggered Flow). Tented creates an Untitled flow you can rename at the top of the page, and you land on the visual flow builder with three tabs: Overview (analytics), Edit Flow (the canvas), and History.Set the trigger
Click the Trigger node to choose how contacts enter: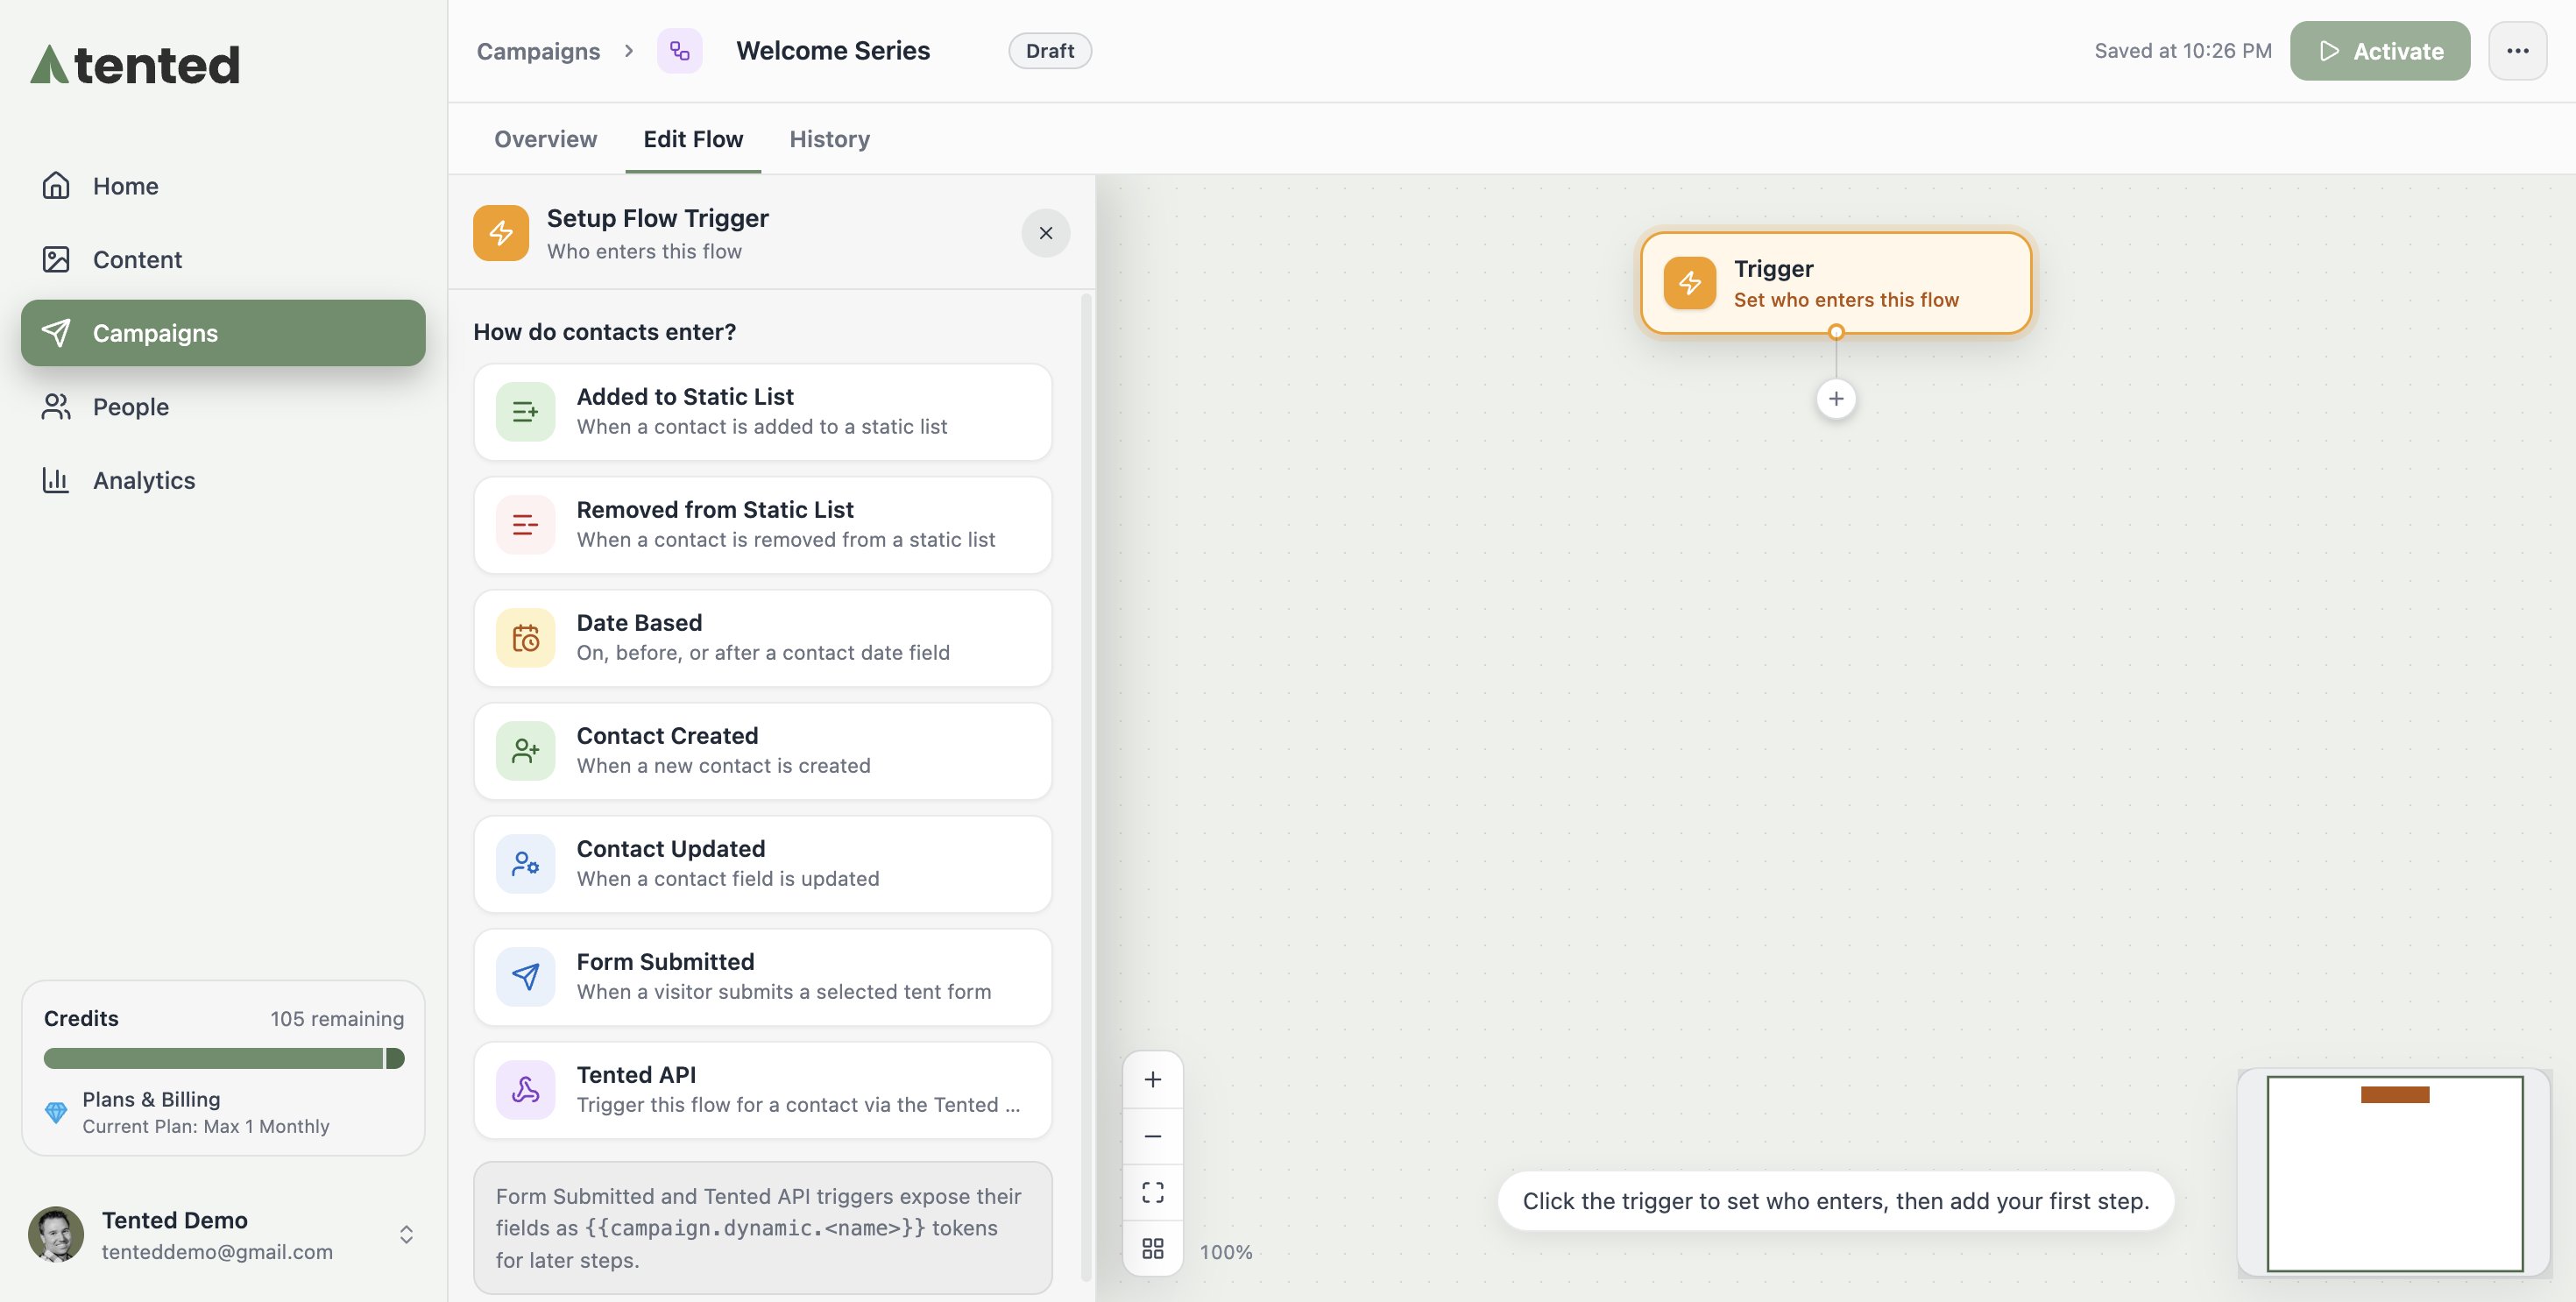
- Added to Static List — the classic welcome-series trigger
- Removed from Static List
- Date Based — on, before, or after a contact date field
- Contact Created — the moment someone new hits your database
- Contact Updated — when a contact field changes
- Form Submitted — when a visitor submits a form on one of your tents 🏕️. Each answer is also handed to the run as a
{{campaign.dynamic.*}}token, so later emails can echo what was submitted. - Tented API — an external system enrolls the contact by calling the public API, optionally passing values that become
{{campaign.dynamic.*}}tokens (a coupon code, an order number, …)
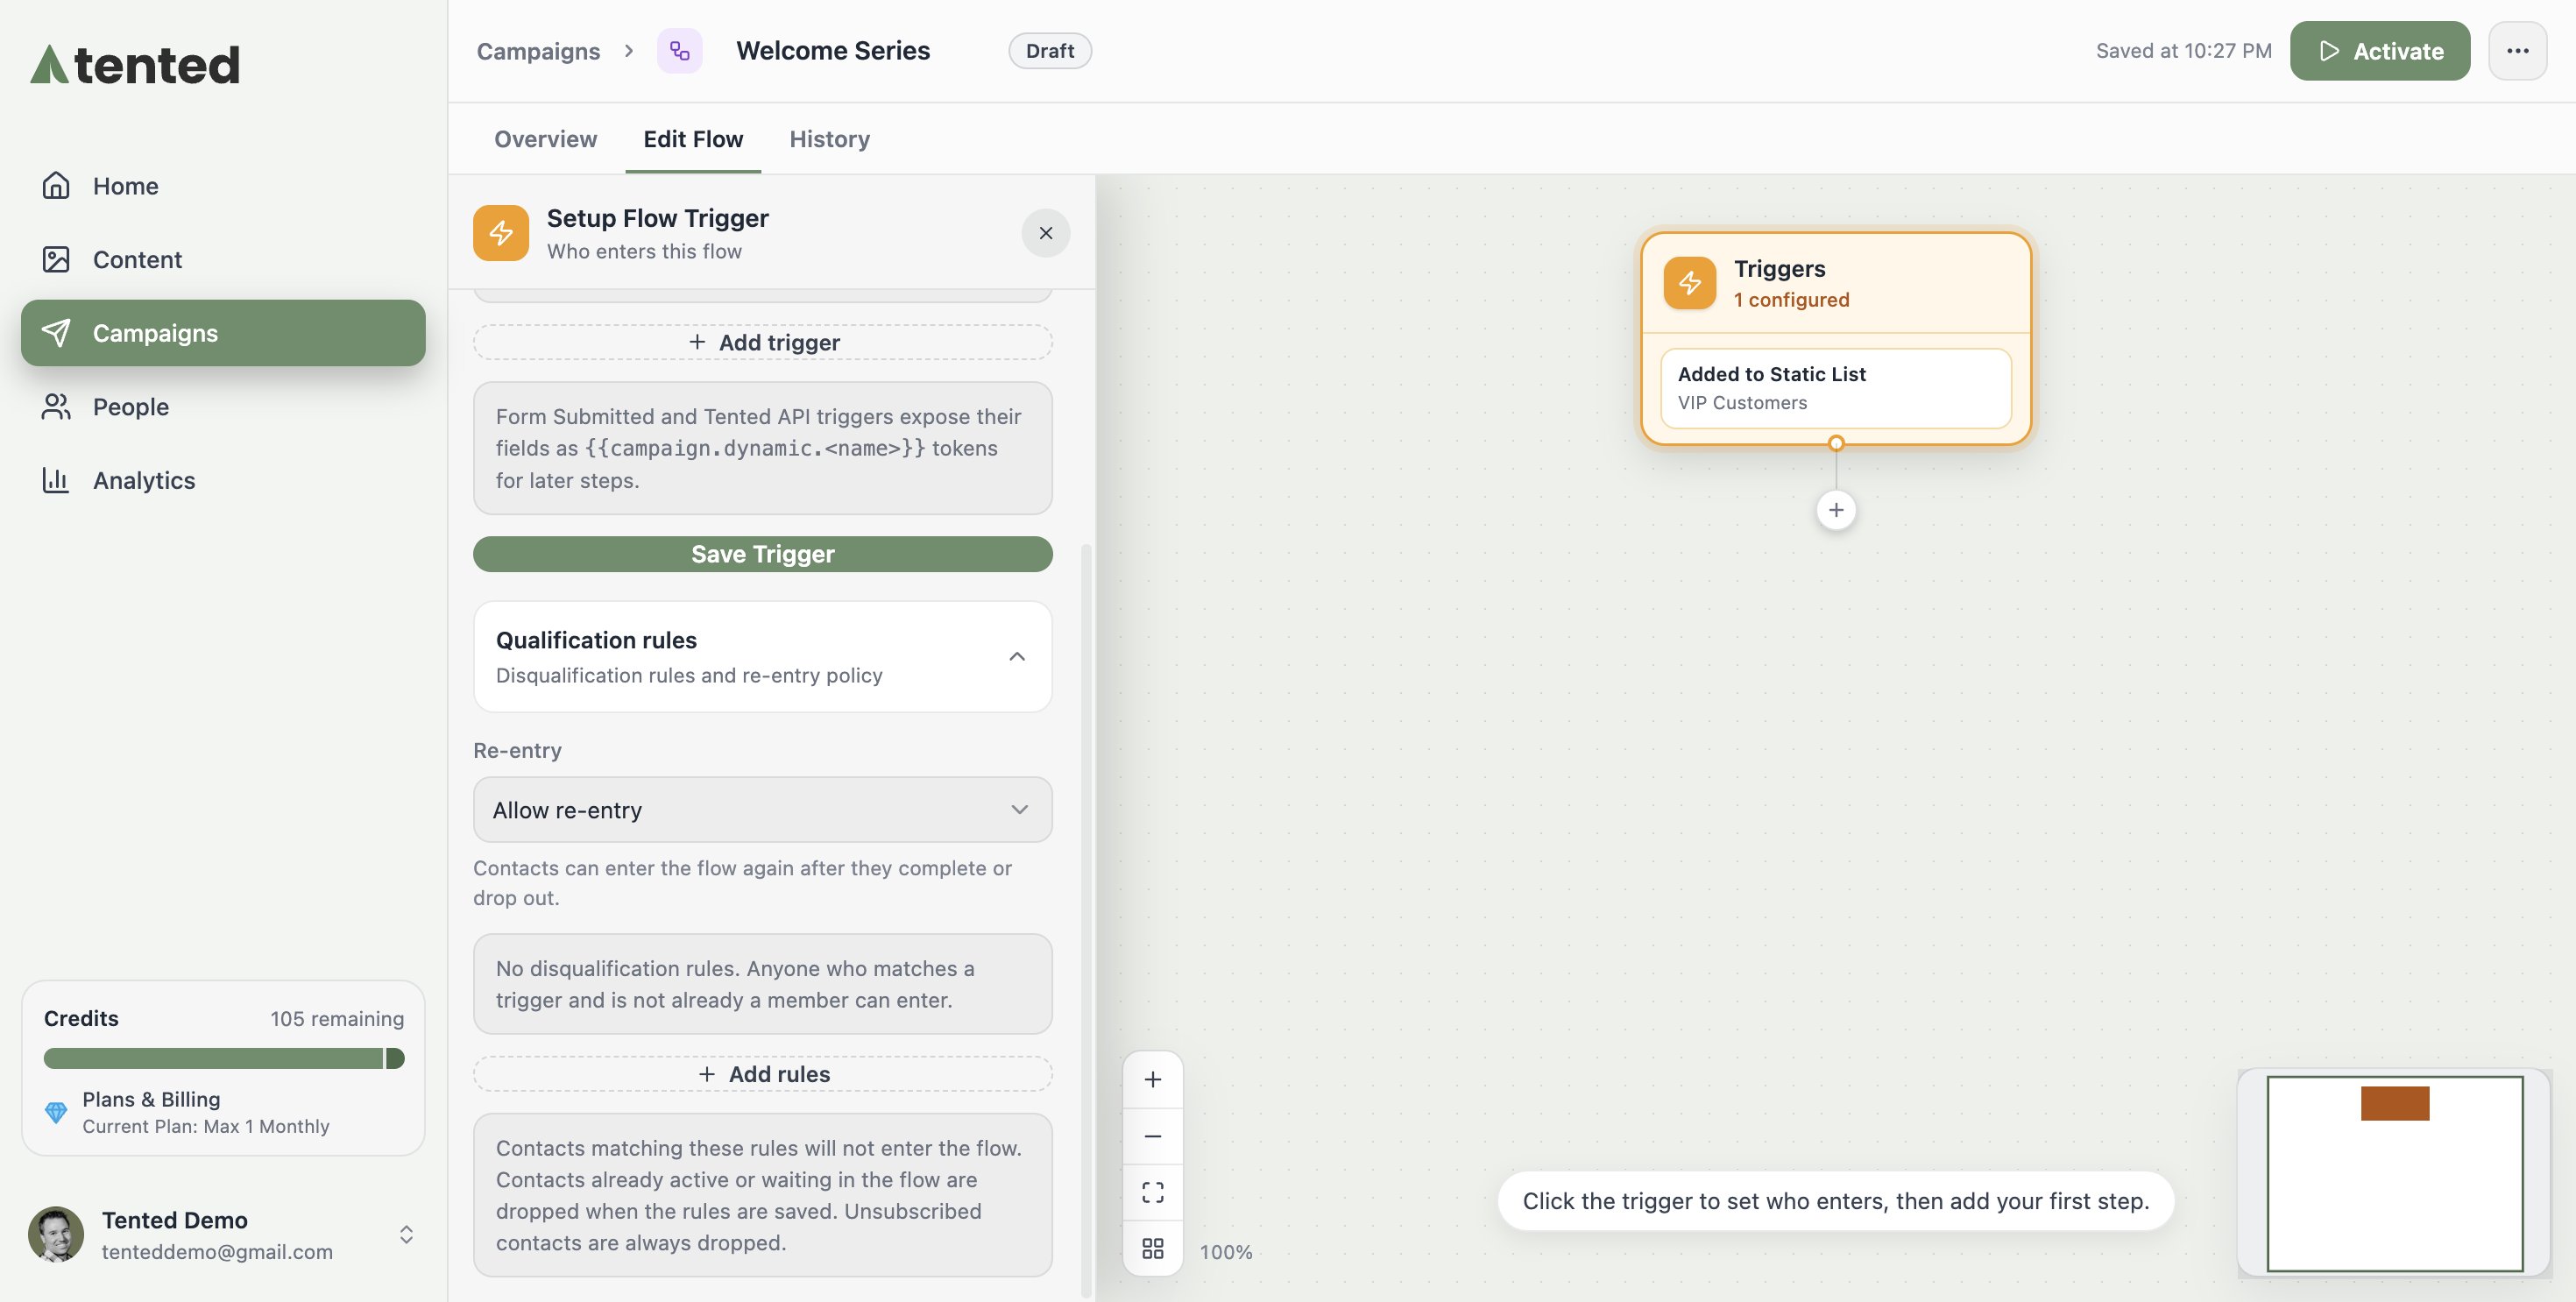
Qualification rules
Below the triggers you’ll find Qualification rules — the fine print of who gets in:- Re-entry policy: allow contacts to go through the flow again after they finish (or block them to once ever).
- Disqualification rules: audience rules that keep matching contacts out — for example, exclude anyone whose lifecycle stage is already “Customer” from a lead-nurture flow.
Build the steps
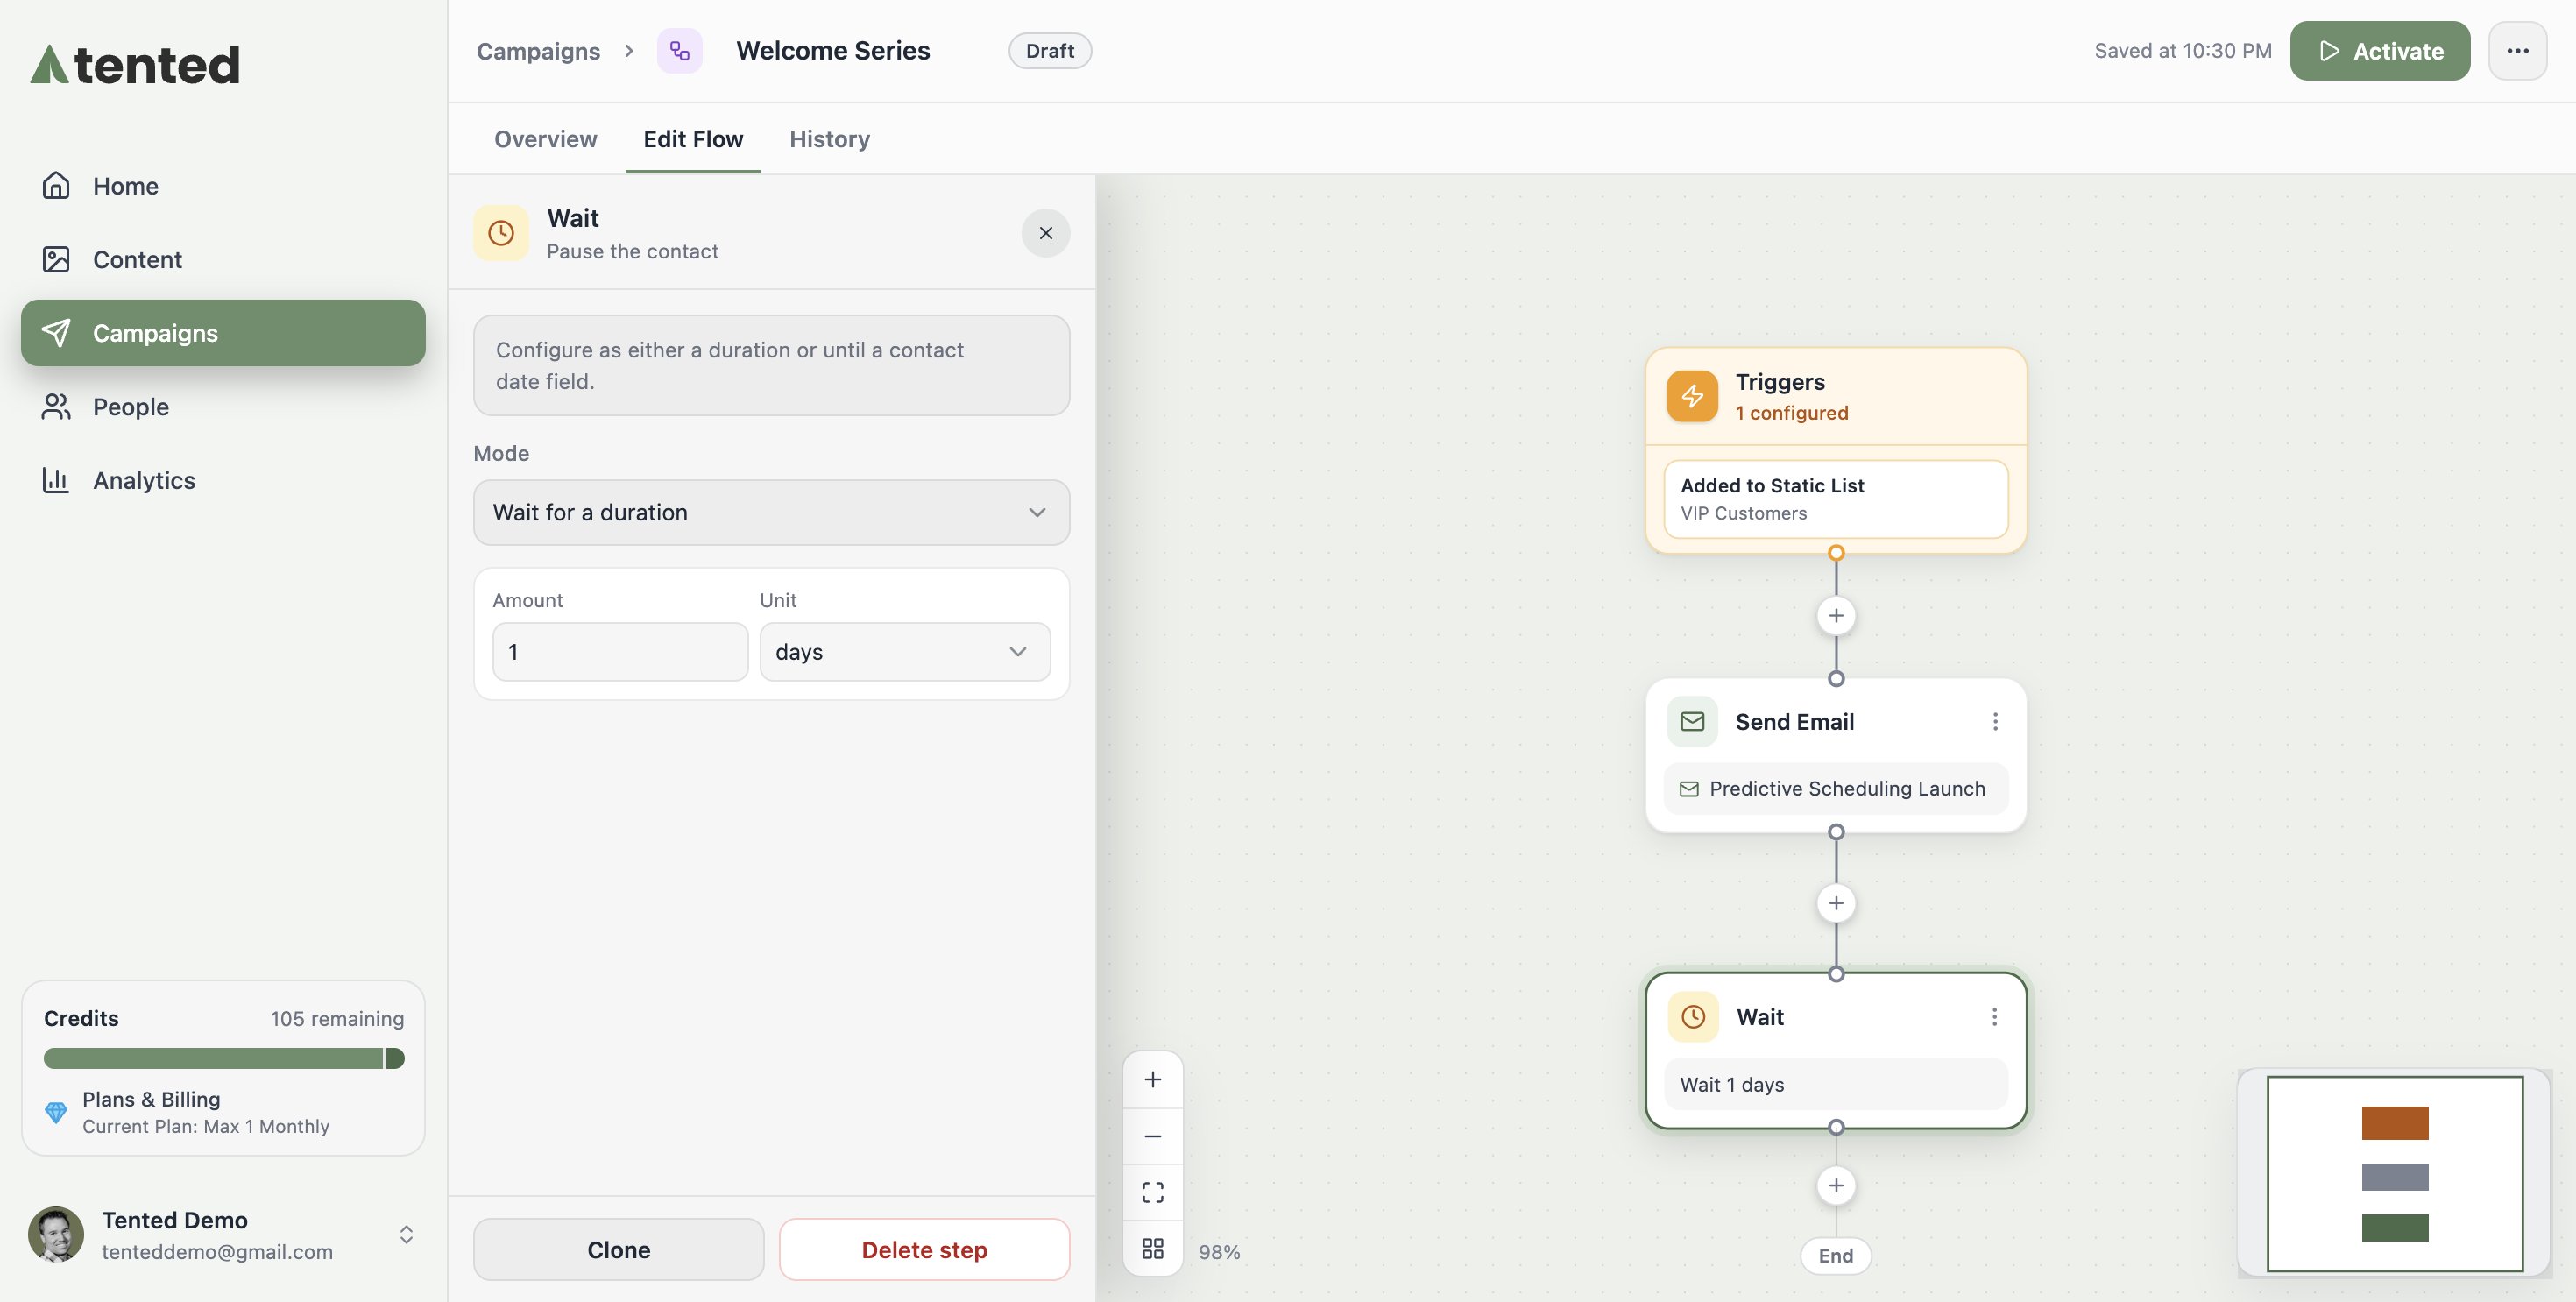
Click + anywhere on the canvas to add a step. You’ve got a full automation toolkit: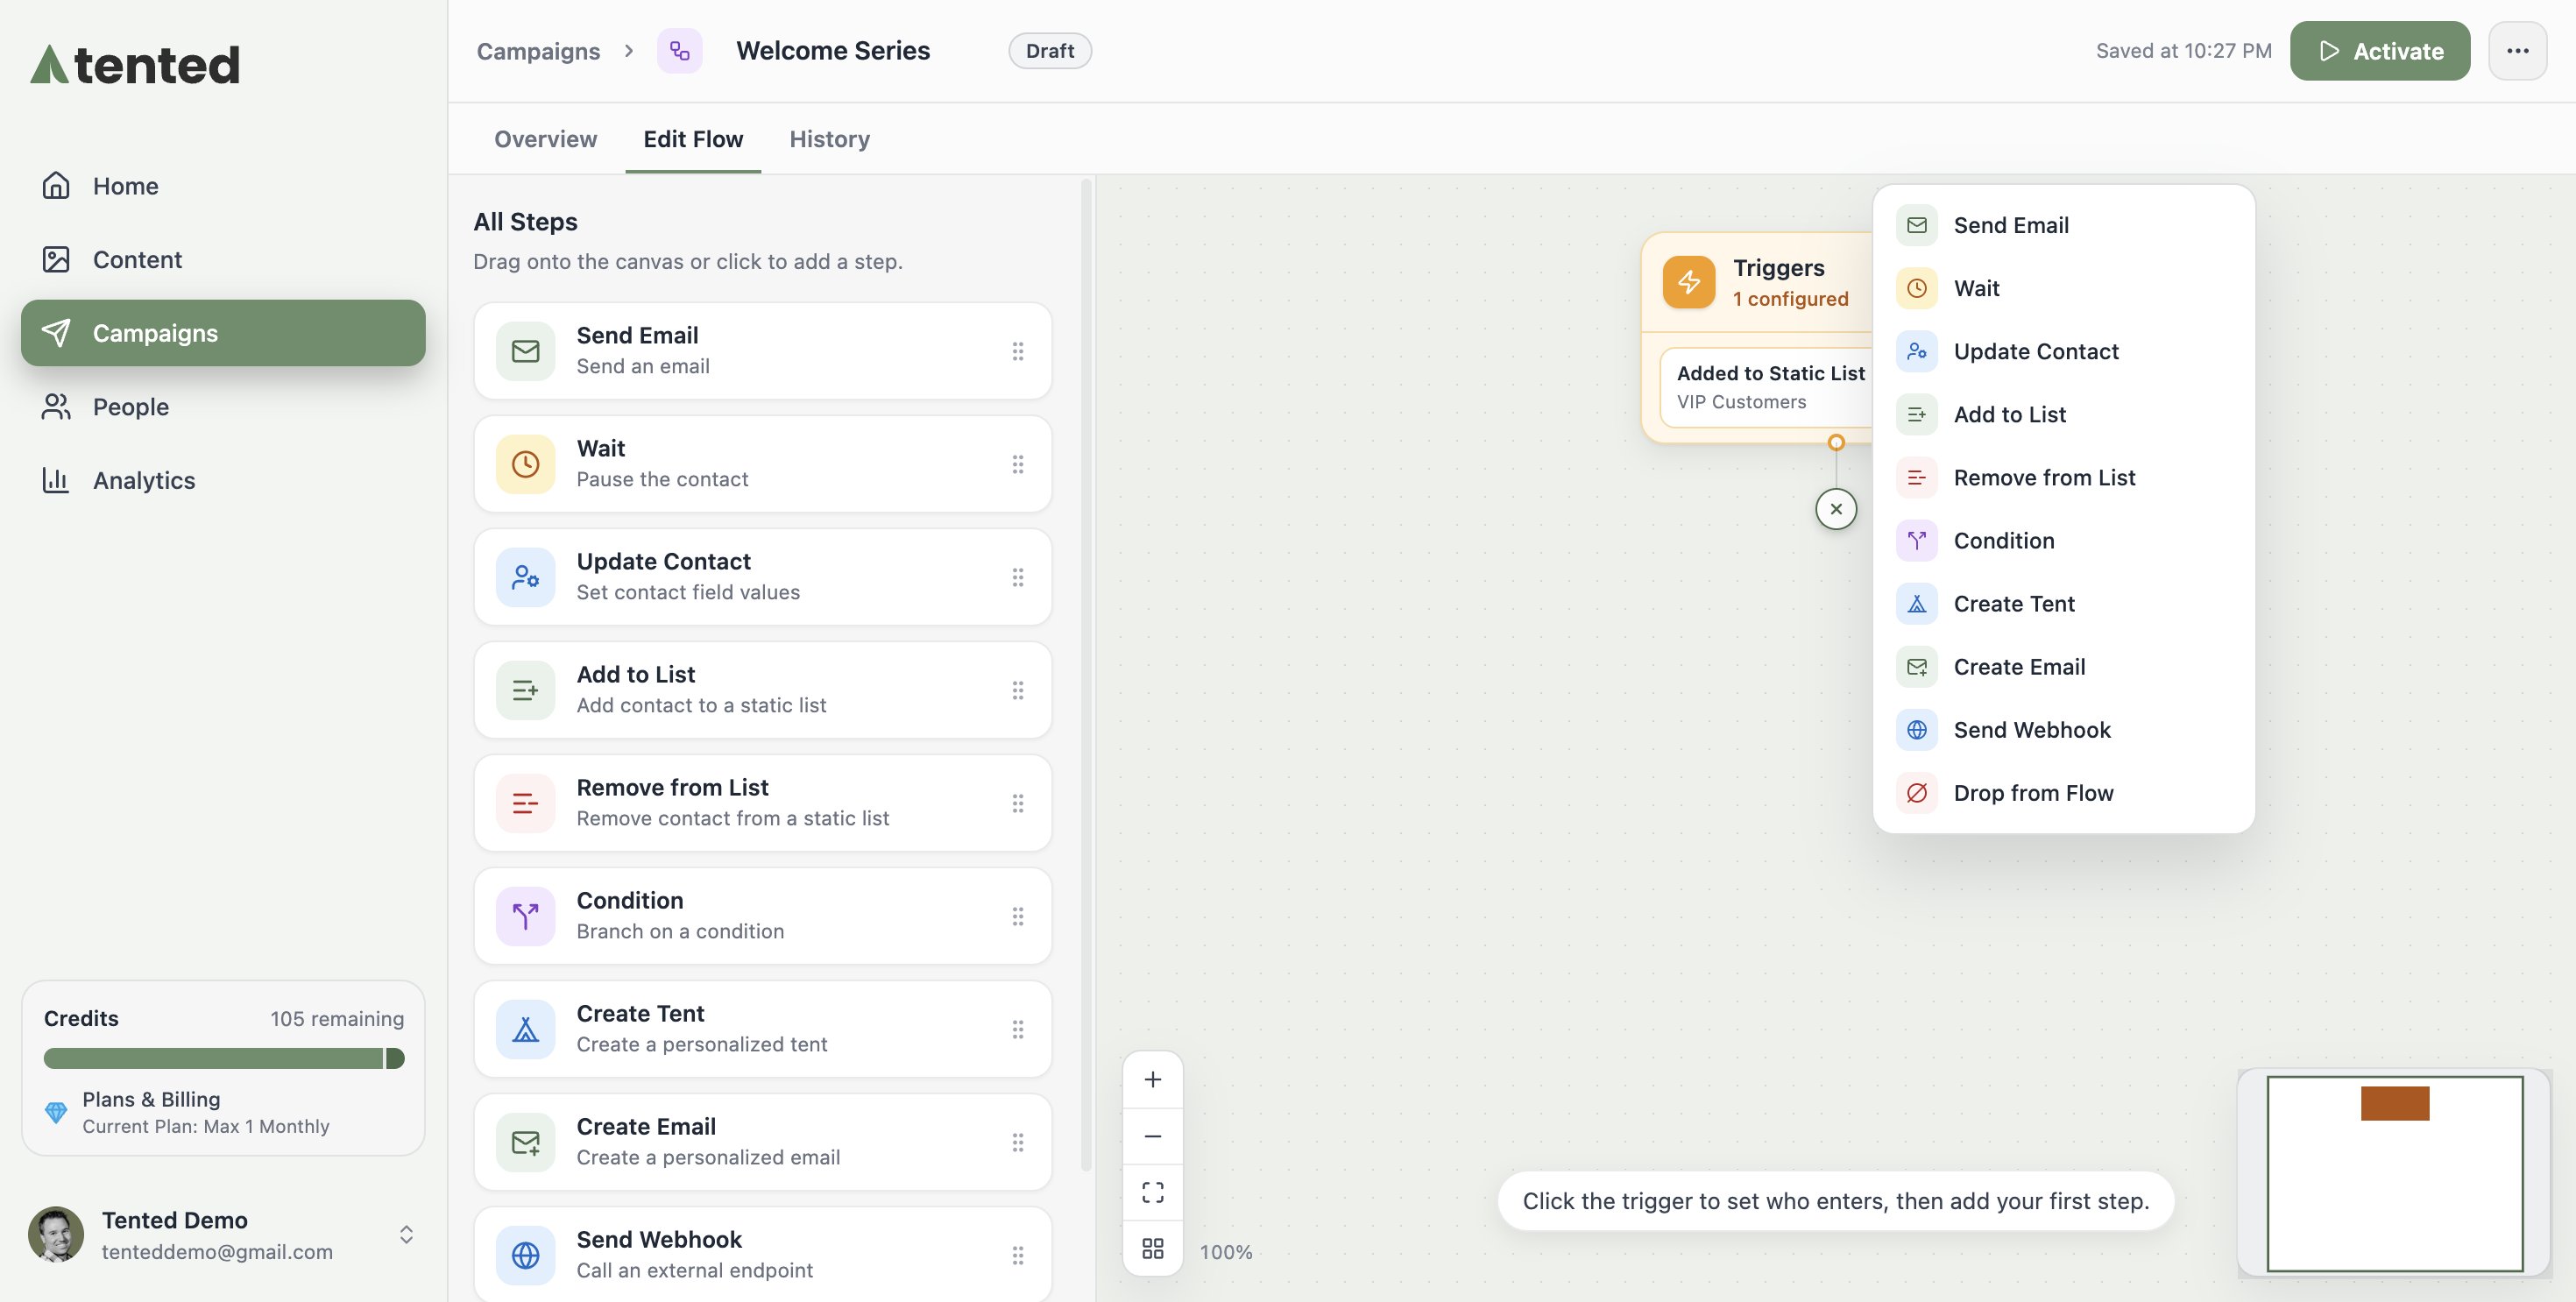
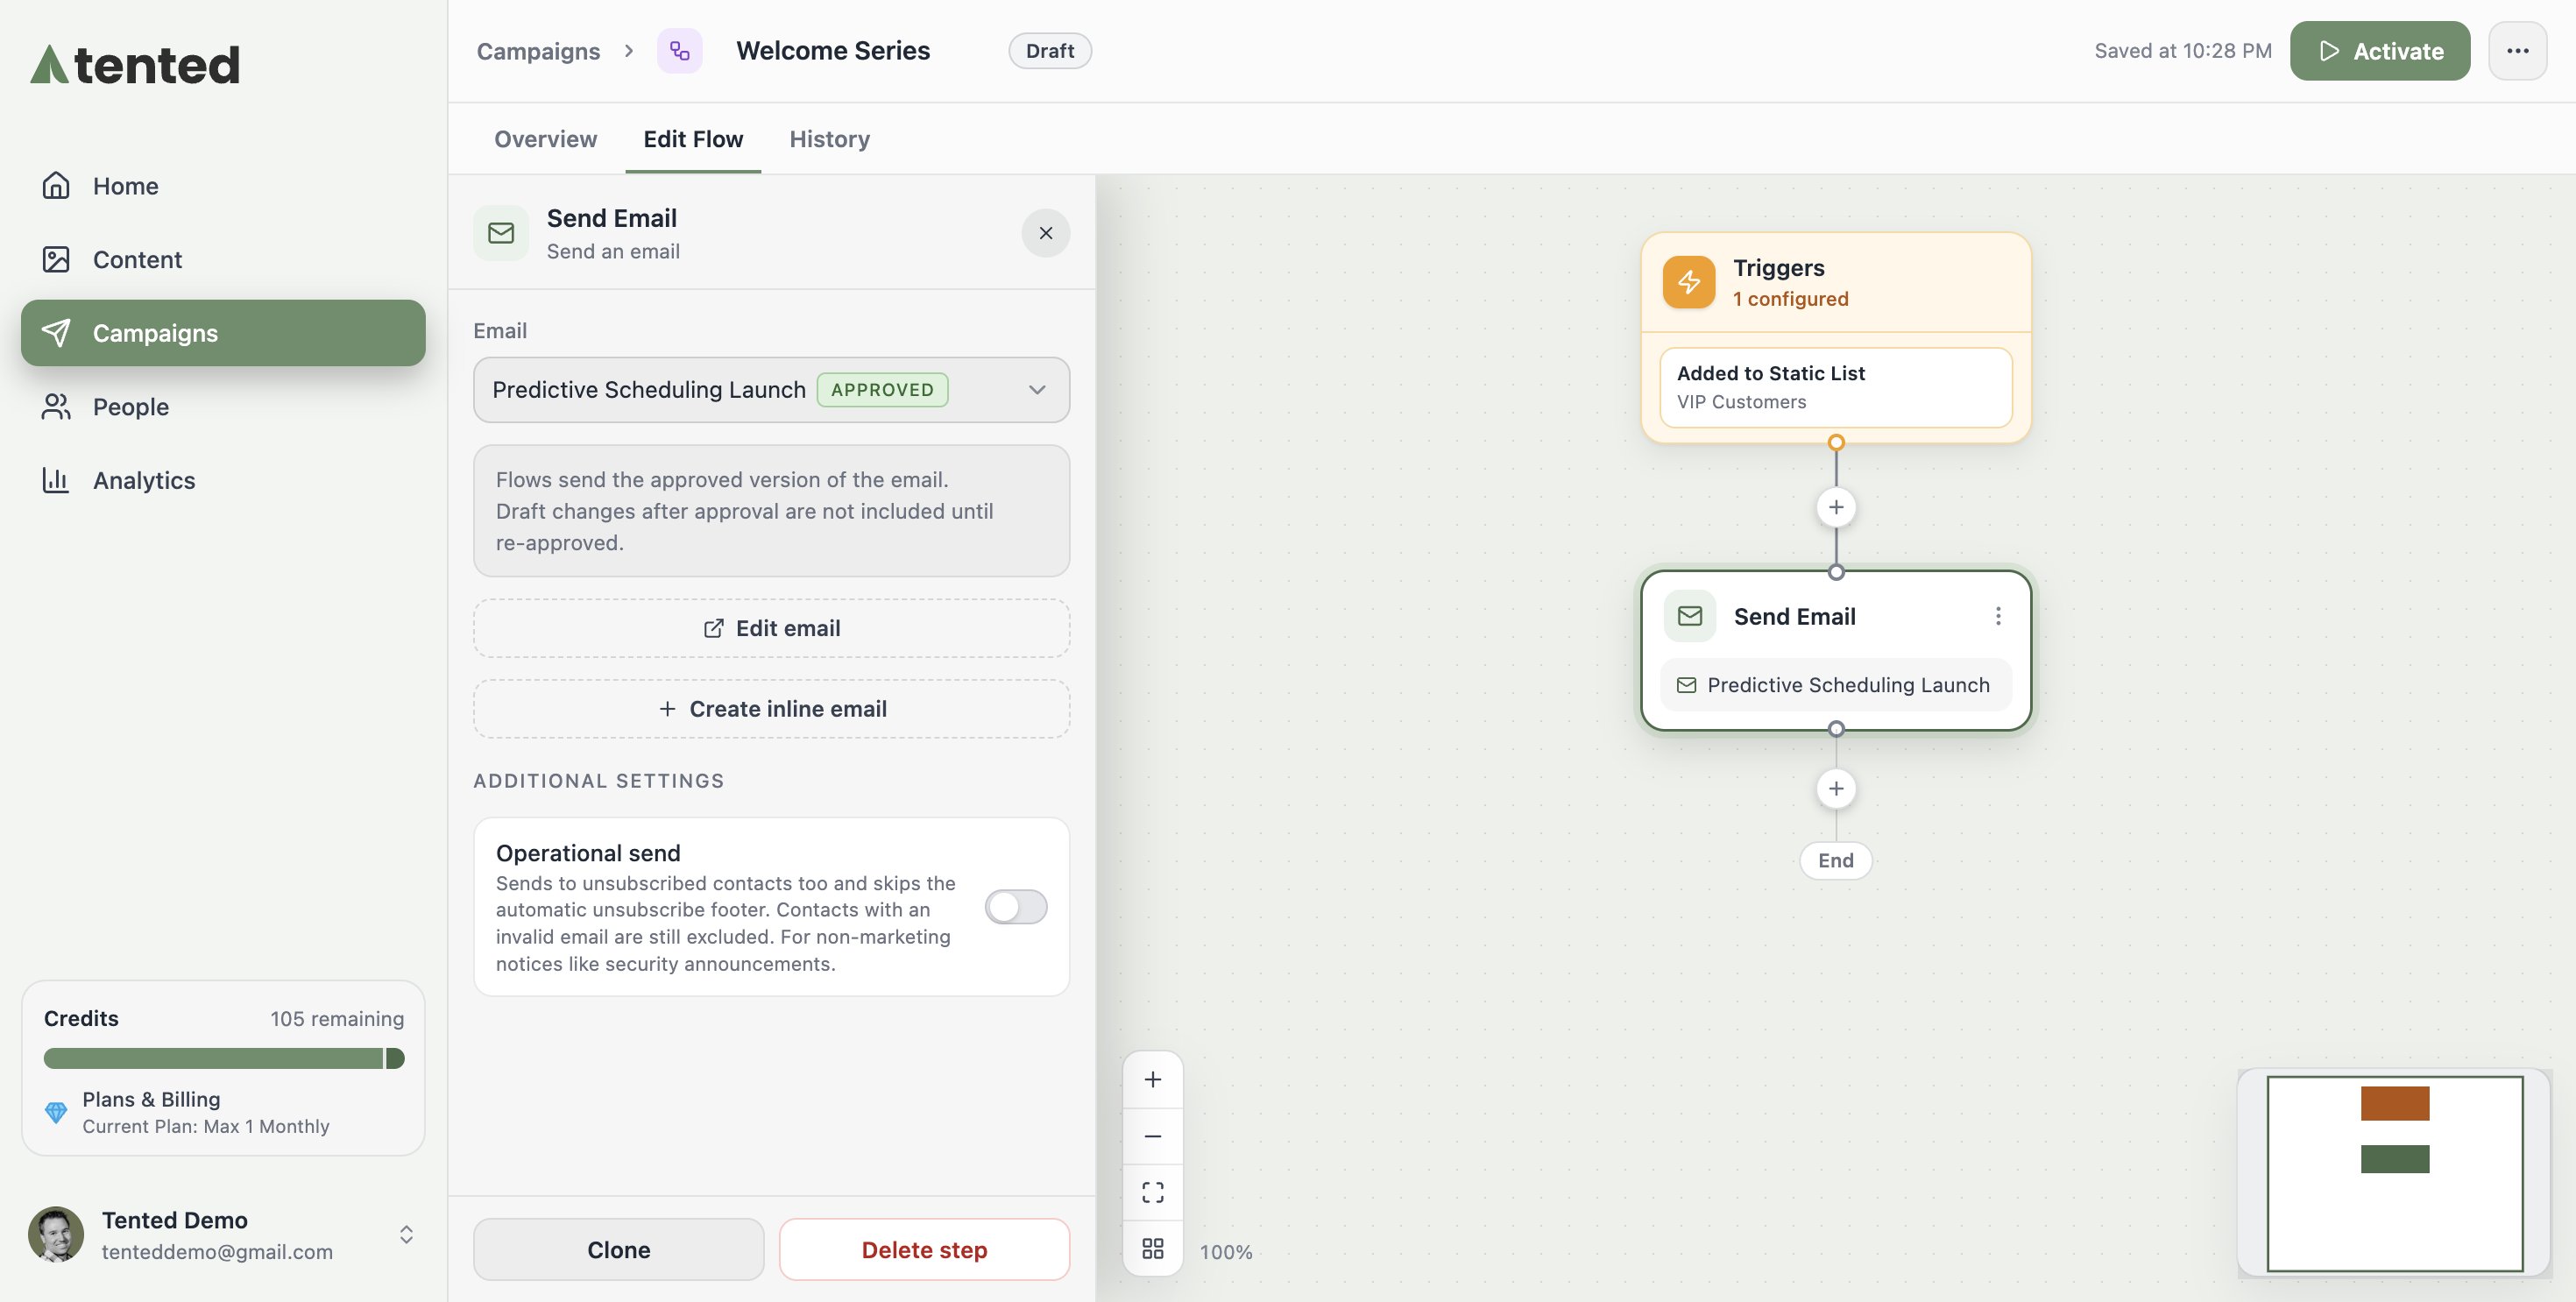
For a Send Email step, pick any approved email — the same approval rule as blasts — or compose one inline. There’s also an operational-send toggle for non-marketing notices.
The Create Tent step
The Create Tent step generates a personalized landing page for each contact as they pass through the flow — a unique page per person, built from their contact data.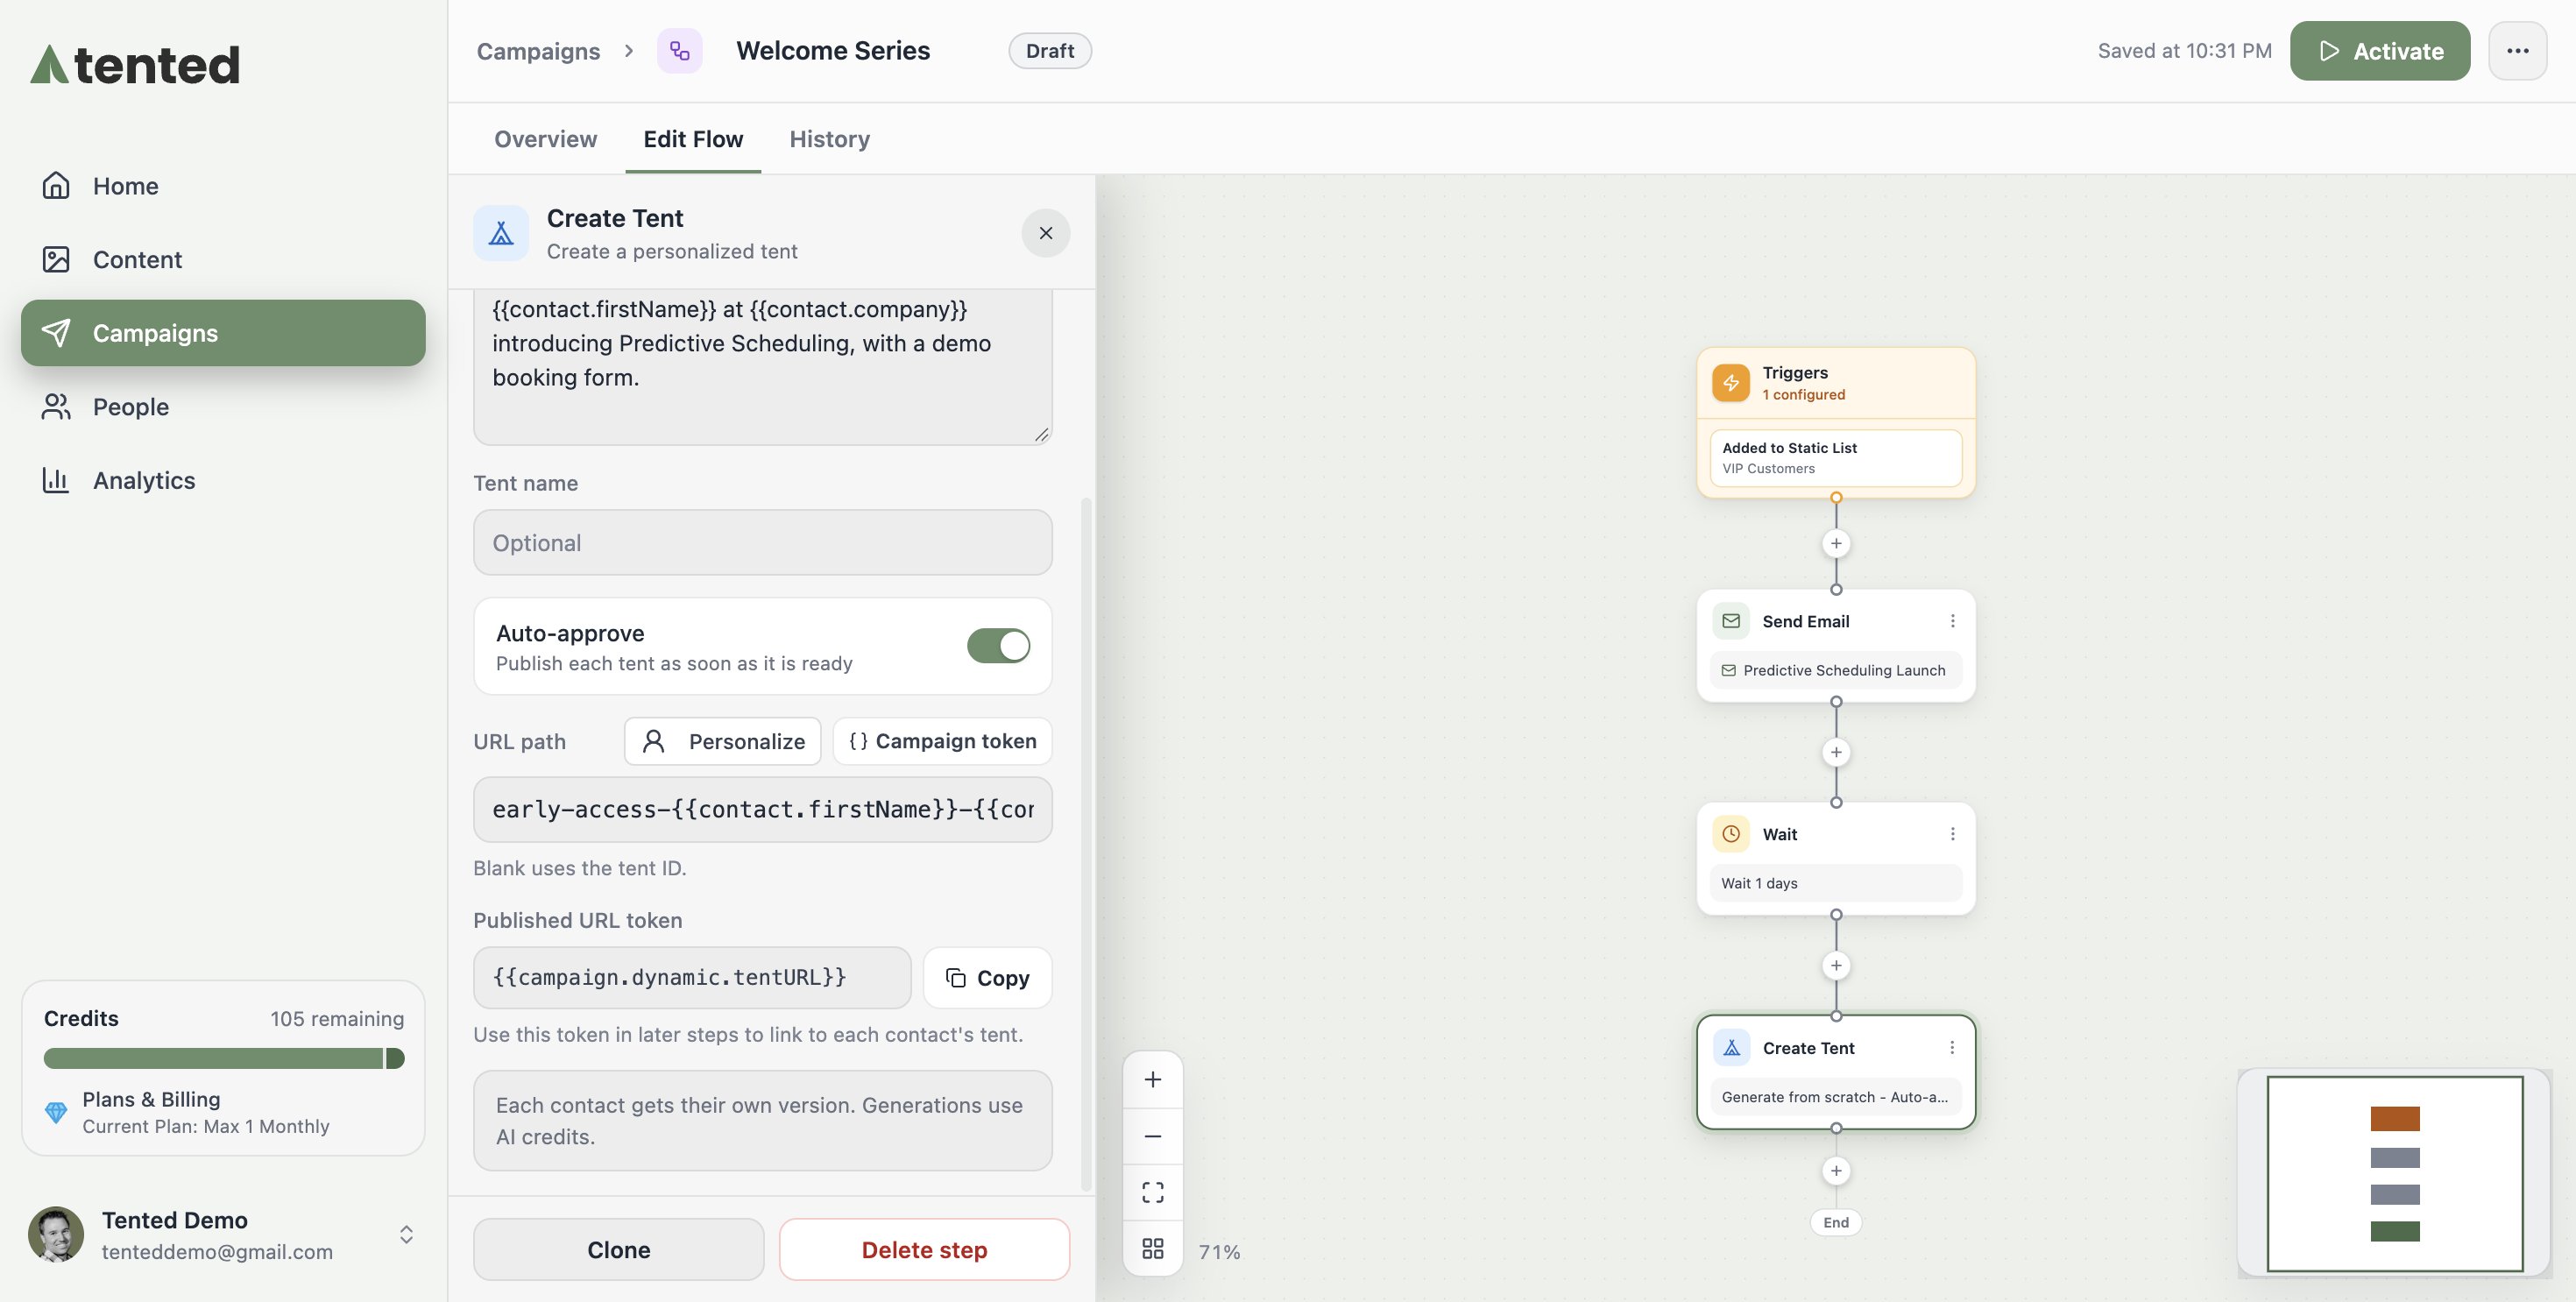
-
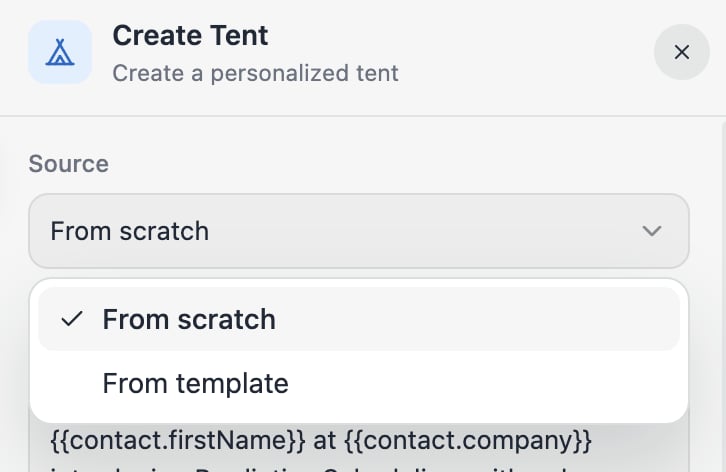
Source — From scratch (generate with AI from a prompt) or From template (copy an approved tent template, no generation credits).
-
Prompt — what to generate. Click Personalize to drop in contact tokens like
{{contact.firstName}}, so every contact gets a page tailored to them. - Tent name and URL path — both optional and both personalizable; a blank URL path falls back to the tent ID.
- Auto-approve — publish the generated tent automatically, so it’s live the moment it’s created.
The Create Email step
The Create Email step is the email twin of Create Tent: it creates a personalized email for each contact as they pass through the flow, so every person gets copy written for them rather than one shared email with merge tokens. Configure it with:- Source — From scratch (generate with AI from a prompt) or From template (start from an approved email template; choose Create without generation to copy it as-is with no generation credits, or Generate with prompt to let AI rework it).
- Prompt — what to write. Click Personalize to drop in contact tokens, or the campaign token picker for values from earlier in the run: a form submission, API trigger tokens, or a Create Tent step’s
{{campaign.dynamic.tentURL}}, so the generated email can link to that contact’s own page. - Email name, Subject, and Preview text — all optional and all personalizable. A blank subject falls back to the template’s default, or to the subject the AI writes for a generated email.
- Sender — optional from name, from address, and reply-to overrides. Leave them blank to inherit the template’s defaults, then your workspace sender defaults.
- Auto-approve — approve the email the moment it’s created, so a later Send Email step can send it without anyone opening the editor. Turn it off to leave each email as a draft for review.
Activate it
Click Activate and your flow goes live: from now on, contacts matching a trigger are enrolled automatically and start moving through the steps.Activating flows requires a Pro or Max plan. On the Free plan you can build, edit, and save flows — the canvas shows a reminder, and an Upgrade to Unlock gem appears in place of the Activate button. If a workspace downgrades to Free, its active flows are paused automatically (members stay put, and resume if you upgrade and reactivate). See Upgrading Your Plan.
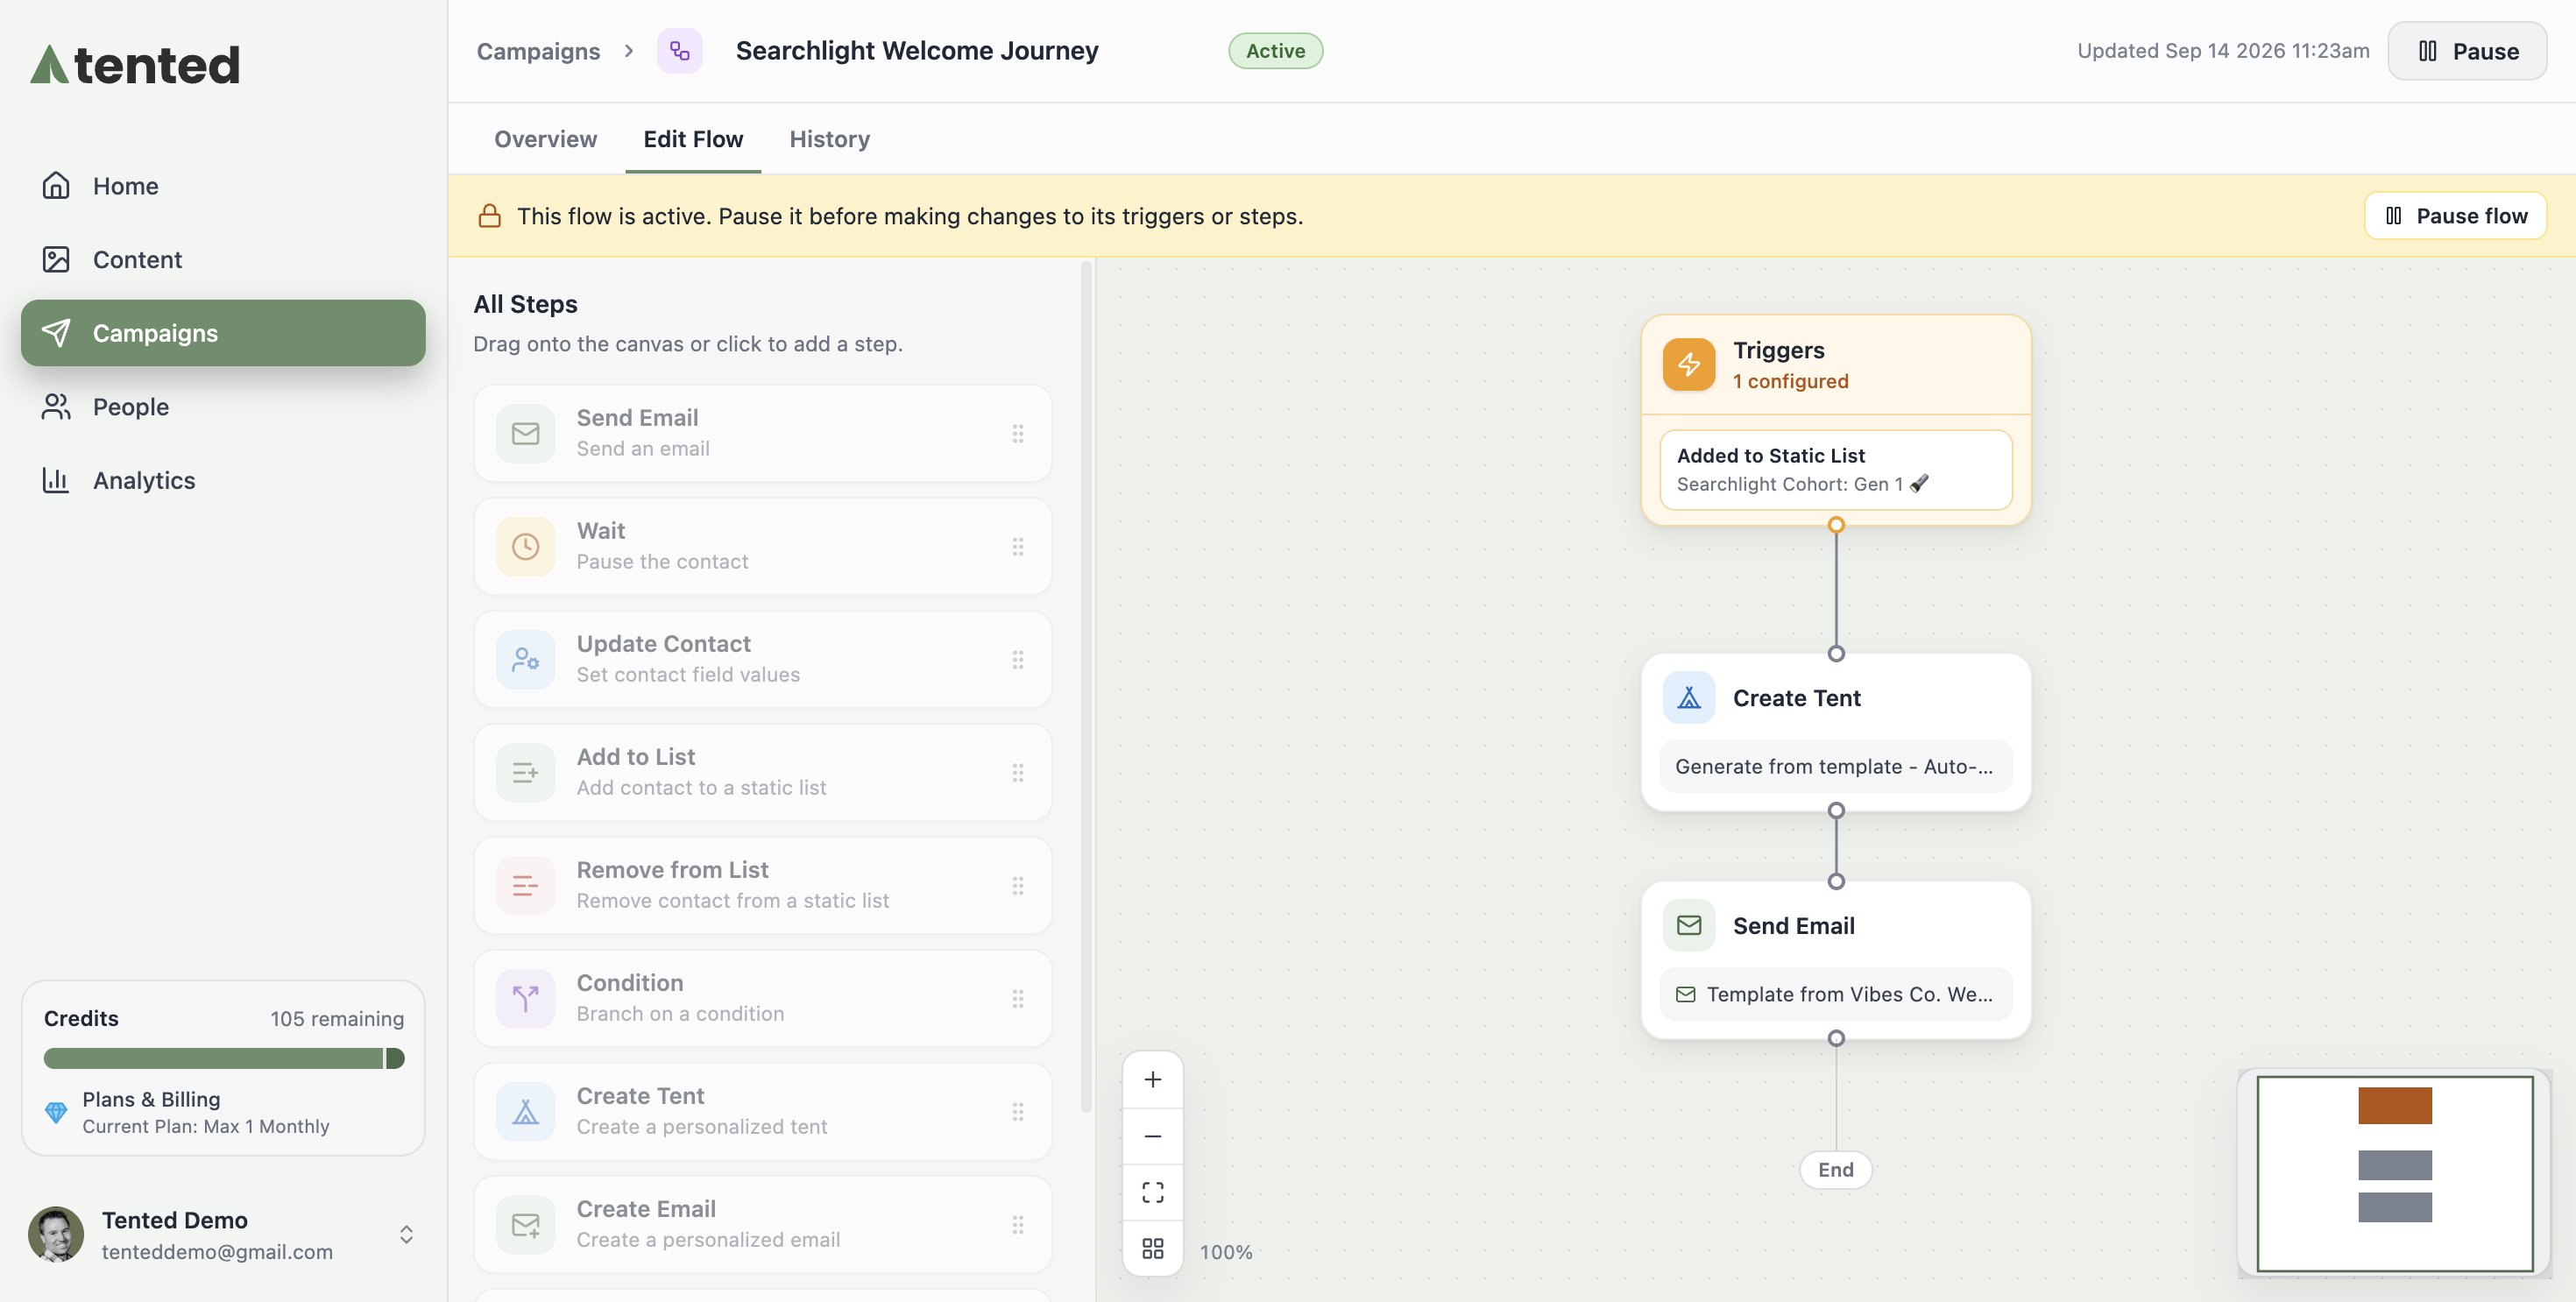
Active flows are locked for editing — hit Pause first if you need to make changes, then reactivate. Pausing doesn’t kick anyone out: contacts already in the flow simply wait, and pick up where they left off when you reactivate. Triggers fire on new events after activation (evaluated about once a minute); contacts already on a list won’t enter an “Added to Static List” flow retroactively.
Track performance
The Overview tab shows your flow’s vitals: total contacts entered, how many are currently waiting, the most recent entry, who’s parked at each Wait step, and per-email stats (sent, delivered, opened, clicked, bounced, unsubscribed, spam).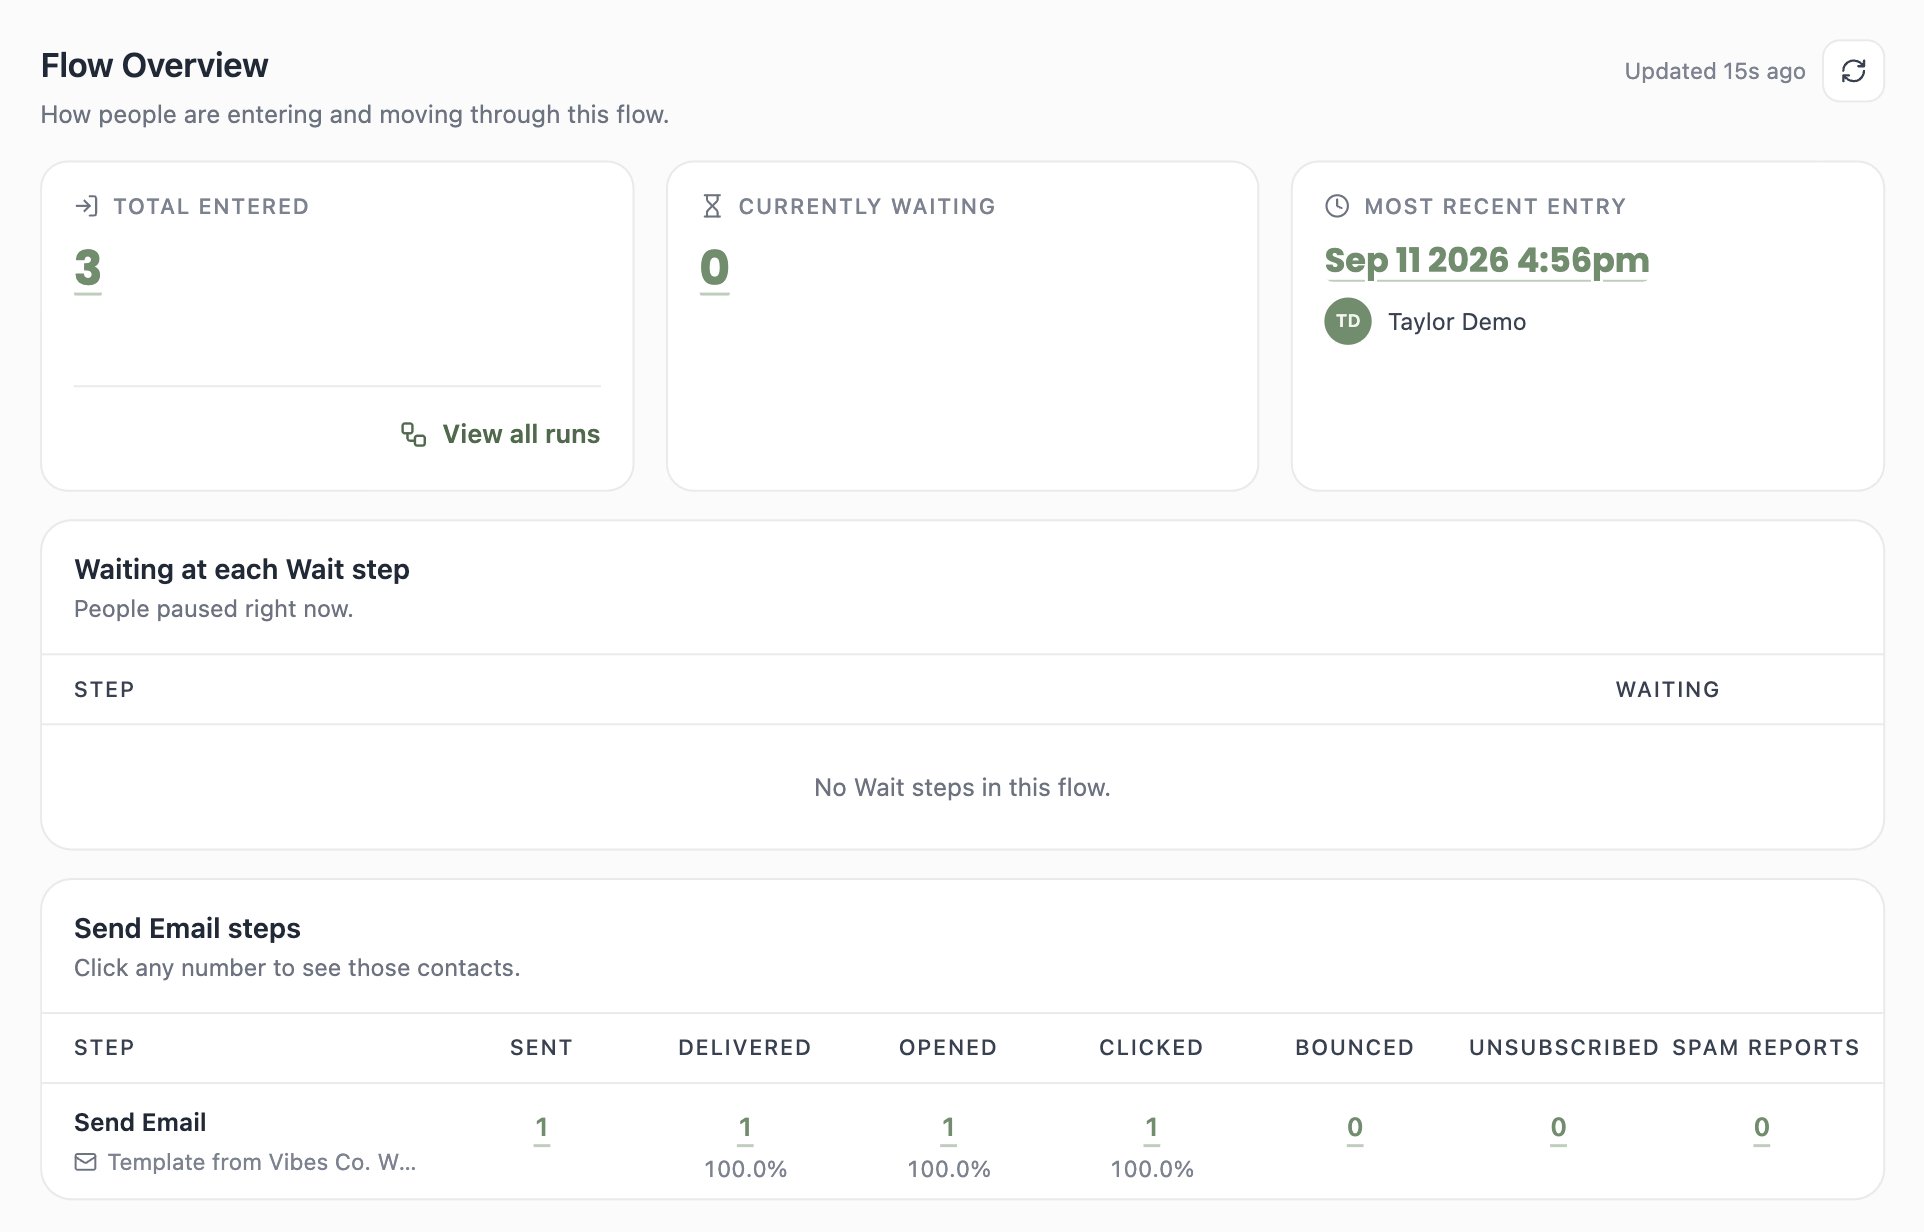
See every run
The History tab lists every contact who’s been through the flow — their status (In Flow, Completed, Exited), when they entered, and when they left. Filter by status or date range, and click Export for a CSV.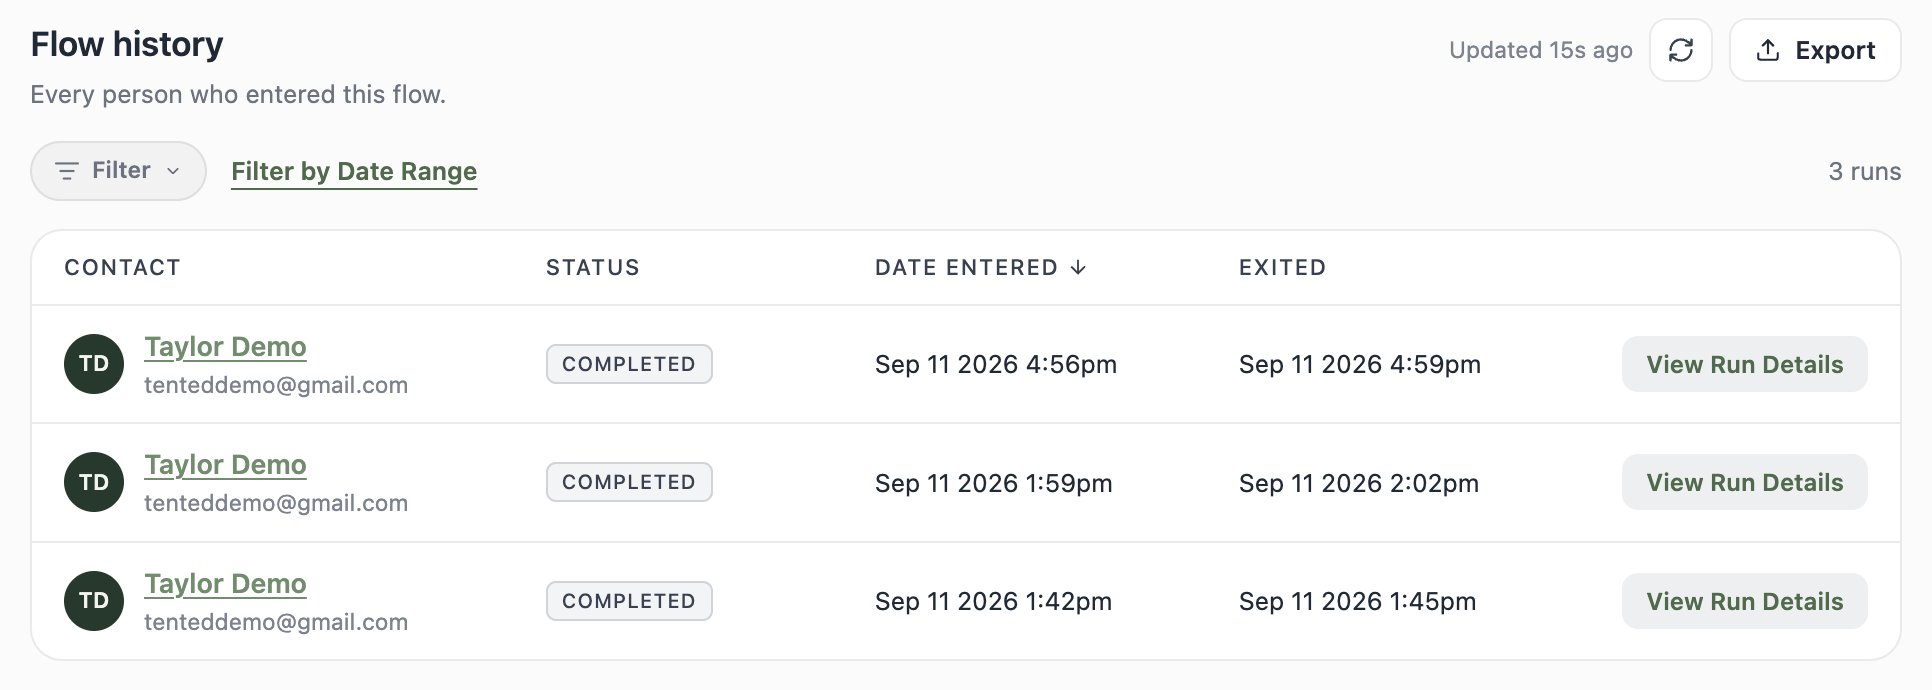
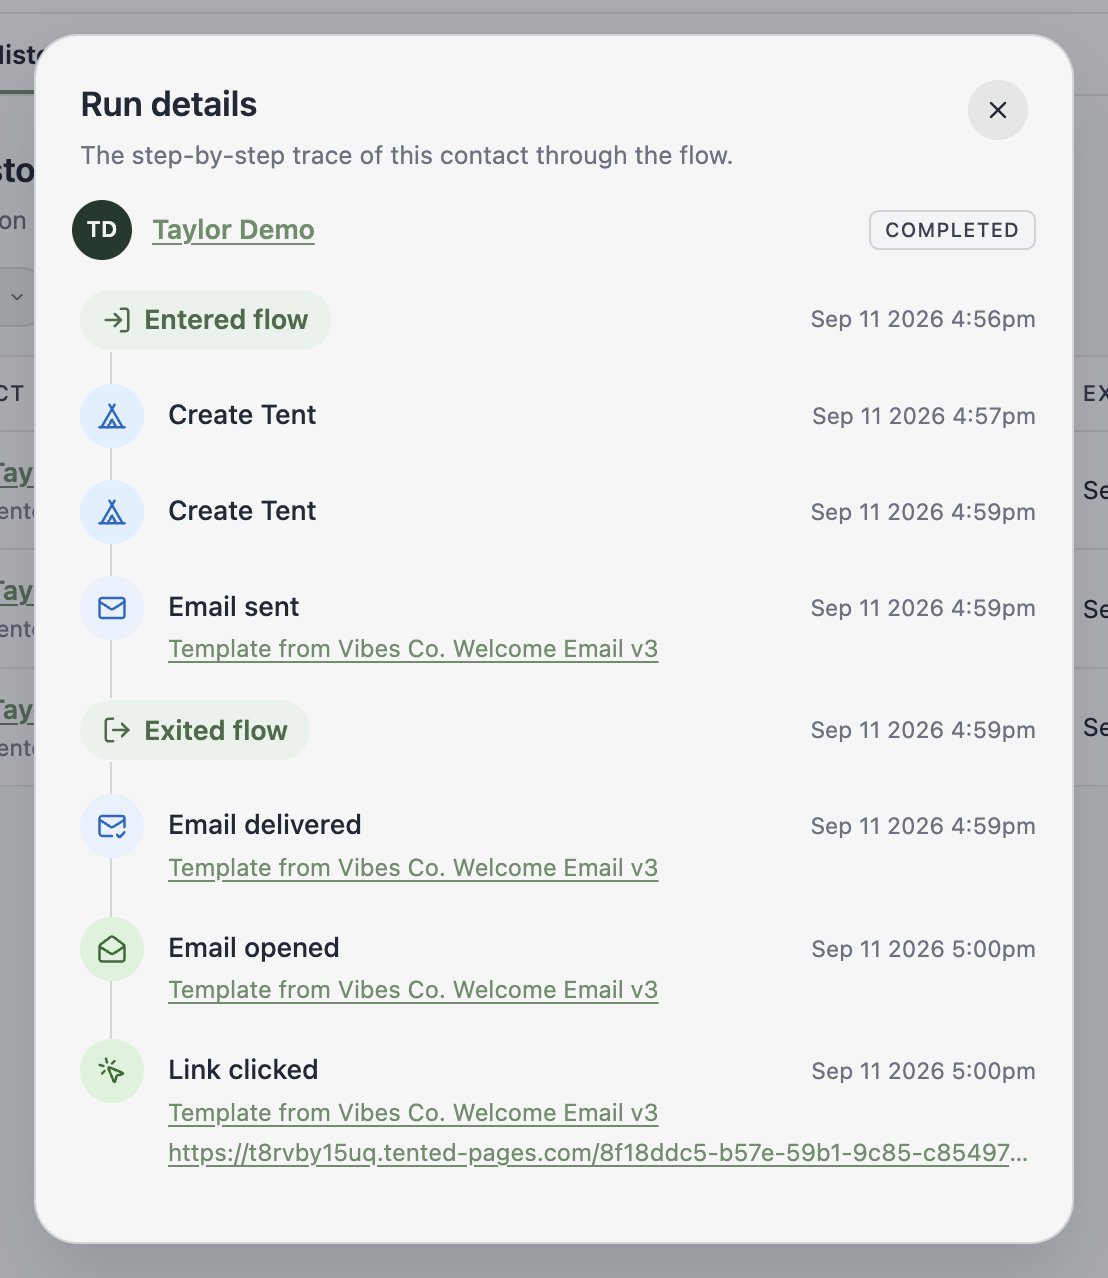
Deleting a person ends any run they’re partway through, but the run stays in the history. It shows them as a Deleted contact, with the name and email from an email this run sent them if there was one, and the run’s exit reads Person was deleted. The CSV export marks them as deleted too.